Along the Grapevine


14 Comments

Puffball Mushroom Strata

DSC03614.JPGHaving discovered four good sized (think soccer balls) puffballs in our garden recently, I felt compelled to do something new with them. My first thought was to make a lasagna, which I did, but since good lasagna recipes already exist, like this one, I decided to write about something else that didn’t rely on the goodness of tomato and cheese to make it interesting. I also wanted to use mostly ingredients from my garden which at this time of year is relatively easy to do. So although it is lasagna related, I didn’t feel right calling a lasagna, and since it is made of layers, I’ll call it a strata.

With so many to work with, I cooked all of them the same way and froze those I didn’t need for this dish or my actual lasagna for later use.

If you find puffballs which are ready to eat, not overripe or infested with bugs, pick them, clean them and either cook or dehydrate immediately. They do not store well. For more information on identification etc., refer to this page.

The first step is to wash them and peel them. The thick outer coating is easy to remove just by pulling it off.

Then slice them in about 1/2 inch thick slices.

I prefer to roast them in the oven at 350 degrees as by frying them they tend to absorb too much oil. Just brush them with oil on both sides and roast for about 10 to 15 minutes until they are a golden colour. Once cooled they can be stored in an airtight container in the freezer for at least a couple of months.

To make a strata, I hope you will read this as a guide but not feel you have to follow it to the letter if you want to use other flavours. I used a squash puree mixed with butter as I would tomato sauce in a lasagna.  I wanted to add a light miso, couldn’t find any and added some tamarind instead which did not make for a very pretty colour. Next time I’ll try miso or nothing at all.DSC03615.JPG

For greens, I mixed two packed cups of fresh chopped greens. You could go conventional and use spinach, but I used a mixture of mint, parsley, lambsquarters, mallow and dandelion greens. These I mixed with 500 ml. of cottage cheese,  one beaten egg and some salt and pepper.

The other layer was made of caramelized 4 large onions and 4 Tbsp of sumac powder. A quick and easy way to caramelize onions I learned recently is to cook the onions in a large frying pan or wok with no oil at first, stirring them as they brown and turn translucent. This takes about five minutes. Then add a splash of oil and the sumac and seasonings and continue to cook, about another five minutes, until they are good and brown.

To assemble this dish, I spread half the squash mixture on the bottom, then a layer of mushrooms, a layer of greens, a layer of onions, another layer of each of the latter three and then topped it with the other half of the squash.

Bake at 350 for about 40 minutes. DSC03617.JPG

I was pleased with the results and found the flavour of the mushrooms stood out better in this than in my cheese and tomato combination. The generous amount of onions and sumac went perfectly with the greens. I highly recommend using mint too. When I make it again the only change I would make is to omit the tamarind which is really just a question of colour.


7 Comments

Dolmas, or Venison Stuffed Grapeleaves

DSC_0121
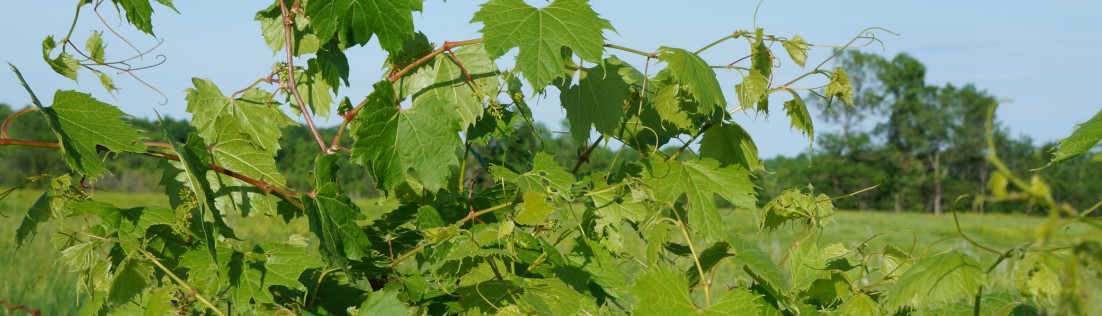
I have already posted recipes for dolmas using leaves from wild grape vines, and really thought I was done. My previous recipes have served me well and I saw no need for any more variations but with a little ground venison at my disposal and a special request to prepare dolmas, I felt compelled to add to my repertoire.  You don’t need to use venison in this recipe – any ground meat will work just as well. The spices are what makes these so good, and by using a generous amount of short-grained rice the texture is light.

I also feel the need to remind readers that grape leaf season is coming to an end, and this is the time to harvest all you will need for the winter months. The weather has been kind to the vines, and if I’m not mistaken the season has been longer this year than usual.

I am sure this recipe could be cooked in an Instant Pot in about half the time, but I opted for the old-fashioned way so I could keep an eye on their progress. However, when cooking these on a stove top, it is useful to line the bottom of a pot with something to protect them from getting scorched. I usually use sliced potatoes, but any root vegetable can be used, and then served alongside the dolmas. This time I lined the pot with corn husks, the same ones I used for making tamales. It also occurred to me that a good thick layer of grape leaves would work and add even more grape leafy flavour.

Venison Dolmas

Ingredients
1/2 cup short grained rice
1/3 cup olive oil
1 small onion, chopped fine
2 cloves minced garlic
1 lb ground meat
1 tsp salt
1/2 tsp ground black pepper
1/2 tsp cumin
1/2 tsp coriander
1/4 tsp ground nutmeg
1/4 tsp ground cinnamon
1 tsp smoked paprika
2 tsp ground sumac
1/4 cup finely chopped fresh mint
4 dozen mature grape leaves

Method
Blanche the leaves in boiling water, drain and set aside. Pour boiling water over the rice and allow to sit for 20 minutes, then drain and let cool.
Mix all the ingredients except the leaves together in a bowl. To fill the leaves, place the leaf shiny side down, remove any remaining stem below the leaf. Place about 1 tsp of the mixture at the base of the leaf, fold over once, then wrap the sides inward and continue rolling.
To cook the dolmas, you need to stack them carefully in a pot, close enough together they support each other, but loosely enough they can expand slightly. Pour water or stock until almost covered and place a weight on top to press them down. Bring to a boil, then simmer until almost all the liquid has been absorbed, about 1 hour.

DSC03597DSC03598

DSC03599Related Posts:Wild Grape Leaves;  Vegetarian Dolmas; Stuffed Fermented Grape Leaves


9 Comments

Beet and Currant Salad

DSC03583.JPGWhen I read today’s Fiesta Friday post, one recipe featured from last week particularly caught my eye and I decided to make it right away. Unwilling to go shopping I had to make do with either what I had in my own kitchen or garden, and by the time I finished I had used in my version, still recognizable as Monika’s,  a few ‘new’ ingredients I thought worth sharing.

The recipe I refer to is one for Pomegranate Beet Salsa by Monika at Everyday Healthy Recipes.  It is the perfect dish for these hot dry days- simple to prepare, keeps well, and as good on its own as it is a side dish. Thank you Monika!

The so-called new ingredients in my recipe are red currants (ribes rubrum) and Queen Anne’s lace (daucus carota) leaves. The currants I have used before to make salad dressing and mayonnaise, but I had never thought of putting them whole into a salad. They are found in much of North Eastern US and Eastern Canada. Once established they thrive in sunny spots, and apparently are drought resistant given that they are still thriving in our back yard desert. One source I read describes them as a brilliant red skin encasing a pulpy flesh that contains 3-12 tiny edible seeds with flavours of raspberry, cranberry, gooseberry, rhubarb and a hint of rose. That sounds about right to me. Many sources say they are delicious as long as you add lots of sugar, which explains why they are most often used to make jelly. However, used sparingly in a savoury dish such as this one, no sugar is needed.DSC03586.JPG

As for the Queen Anne’s lace, there is so much of it blooming right now, but I had not given any thought to anything other than the flowers. I know that all parts of the plant are edible and often see reference to the leaves as being good in salads, but have never seen a salad recipe that calls for them. For identification and further information on this plant, please check here.dsc03429.jpg

Again, the herbs I used are all from my garden, but this salad is versatile, and you can make your own mix of greens to add. As for the oil, I used my black walnut infused oil, and I think any nut oil would be good, or just a good quality oil as Monika suggests, such as grape seed oil.

Beet and Red Currant Salad

3 Tbsp finely chopped red onion
3 Tbsp balsamic vinegar
2 cups chopped beets, previously boiled, cooled and peeled
2 Tbsp chopped Queen Anne’s lace leaves
1 heaping Tbsp each of fresh mint and dill
2 Tbsp oil
salt and pepper to taste
3/4 cup red currants
Put the onion and vinegar in a bowl and allow to sit while preparing the other ingredients. Add everything except the currants and mix well. Gently fold in the currants. Refrigerate for at least an hour before serving for best flavour.

DSC03580.JPGLinked to: Fiesta Friday #233


6 Comments

Grape Leaf Pesto

If you have wild grape leaves in your area, this is the best time to pick them while they are still tender and unblemished. I collect them in large quantities and those I don’t use immediately, I blanche and freeze for later use. They are particularly useful in pickles and ferments to help keep vegetables crisp while they also add some good flavour, but can be used in many other ways, some of which you will see in related posts below. For identification, uses and nutritional information, click here for my introduction to them.

Long before there was any green on the vines, I began to think what new recipe I could introduce this year, and came up with the idea of a pesto. The first try was a complete success, although I will definitely try it with some variations. For this recipe I mixed it with nettles to make it greener, as by blanching the grape leaves as I did, they tend to turn a kind of olive colour. Other greens could be used according to what you have available, so feel free to use your imagination. I used black walnuts from our area, but regular walnuts are also fine.

I picked very young ones, but when they are mature I recommend removing any of the central stem that looks a bit tough.DSC03525

Grape Leaf Pesto

Grape Leaf Pesto

4 cups grape leaves, loosely packed

1/2 cup stinging nettles

a small bunch, (about 8) mint leaves

1/3 cup walnuts

1 large clove garlic

150 ml olive oil

salt and pepper to taste

Blanche the grape leaves and nettles for about 10 seconds. Drain and combine them in a food processor or blender with the other ingredients.

This makes a very flavourful pesto which I have enjoyed on pasta, in sandwiches and on crackers, but my favourite is to use it as a base for pizza, spread on an oven-fresh sourdough pizza crust.

DSC03527

And then add whatever you like.

DSC03565.JPG

Related posts: Wild Grape Leaves; Stuffed Fermented Grape Leaves ; Fermented Wild Grape Leaves; Grape Leaves with Roasted Vegetables; Pickerel in Grape Leaves with Mushroom Za’atar Sauce; Quiche in Wild Grape Leaf Shells; Grape Leaf, Herb and Yogurt Pie.

Linked to: Fiesta Friday #228


5 Comments

Kuku Sabzi

DSC03552.JPGThis is a dish I discovered recently in, of all places, a donut shop which I only visited because I was in need of a coffee fix. A little plastic container of something green caught my eye and I had to try it. I decided it was some kind of exotic omelette and that it contained chickpea flour. Other than that all I knew was that it was one of the best store-bought breakfasts I’d had.

When I returned a few weeks later to ask for another one, the owner explained her customers only wanted donuts, so she gave up making her ‘green patties’. She was pleased I was interested, and told me her husband is Iranian, and that this traditional sort of frittata is called kuku sabzi. So at least I had some way of finding out how it is made.

Once I read a sufficient number of recipes, I was able to come up with my own using, you guessed it, weeds from my garden.

What I learned in my research is that it is indeed a sort of omelette, heavy on the herbs and light on the eggs – just enough to hold the mixture together. It seems just about any kind of herb goes well in this dish, as do sometimes dried fruit and/or nuts. Spices also vary, but I came across one recipe that called for advieh, a Persian specialty blend which includes rose petals. The recipe I used can be found here, but do note that if you don’t have rose petals you can leave those out.

So once I mixed up some advieh, picked a lot of lambsquarters from the fields, I went about making my first sabzi.

DSC03541

DSC03548

Kuku Sapzi

Ingredients

2 cups lambsquarters, packed

1 cup parsely, packed

3 eggs, beaten

1 Tbsp chickpea flour

2 tsp advieh

salt and pepper to taste

Method

Chop the greens. Mix them well with all the other ingredients. Heat 4 Tbsp olive oil in a heavy skillet. Add the mixture and pat it down. Cover with a lid and cook on a medium low heat for about 8 minutes. Remove the lid and broil for about two minutes, until beginning to brown on top. Serve warm or cooled. It will keep refrigerated for 3 days.

DSC03556

The number of variations for this recipe could be endless, and I will definitely be making this again but with different herbs and greens, sometimes nuts or cheese and fruit. It is one of those dishes which can be adapted to any location, just about any season, and unless you have something against green, you will want to make it often.

DSC03558

Linked to: Fiesta Friday #227, Lizet at Chipa by the Dozen; Jhuls at The Not So Creative Cook.

Related posts: Lambsquarters,  Lambsquarters Triangles, Lambsquarters Samosas, Lambsquarters and Farro Burgers.


16 Comments

Spicy Chinese Cucumber Salad

DSC03449.JPGI first wrote about prickly ash (zanthoxylum americanum) aka Szechwan pepper last year in this post and now is a good time to revisit this prolific plant and for me to give an update. As I mentioned in my previous post, the berries can be picked at any time of the year once there are leaves on the plants, while it is still green or even when the berry has fallen and only the brown husk remains. This year I started picking in August when the berries were a bright red and easy to spot. Most are still red now in mid-September, but they are beginning to fade. I found the best way to pick them was just to cut off the branches and remove the berries in the comfort of my kitchen. No worries about over harvesting these berries. They are an invasive weed and we can’t eradicate them from our property no matter what we do.DSC03451DSC03450I dried them on the countertop and within a day or so the husks turned from deep red to brown and the shiny black berries were exposed.dsc03453.jpgNow they are ready to be stored and used in so many ways. So far I have made spice mixtures, added them to fermented pickles, to sauces, dressings and even to some sweet dishes. They are not hot like black pepper or chilis but have a citrussy smokey tang to them which pairs well with so many flavours.

For today I made a simple spicy cucumber dish, a popular item on Chinese menus, and one in which the flavour of the Szechewan pepper really shines. I made it rather hot and garlicky, but you can tone down those flavours by reducing the amount you use, and by removing the seeds from the pepper. I did not have chili oil on hand but infused one chopped, dried chili pepper in 2 tablespoons of oil.

Spicy Chinese Cucumber Salad

1 medium cucumber, thinly sliced

2 Tbsp chili oil

3 garlic cloves, mashed and chopped

1 tsp Szechwan pepper

2 dried red chilis

1 Tbsp rice wine vinegar

1 tsp sesame oil

1 tsp white sugar

Roast the Szechwan pepper and the chilis in a skillet until they release their aroma, but being careful not to scorch them. Mix these with the other ingredients for the dressing and pour it over the sliced cucumbers, toss and serve.

IMG_4505

Linked to Fiesta Friday #188, Jhuls at The Not so Creative Cook and Nimmi at Adorable Life.


29 Comments

From Lawn to Table

Even in times of drought such as we are currently experiencing in this area, the wild greens are flourishing and there for the picking. Our vegetable gardens are still struggling, and as I am not a keen shopper I am happy that our lawn is such a great provider. This recipe is another example of what you can do with some of those nutritious, albeit pesky weeds. And if you don’t have such a lawn, you can find all these in any good foraging spots such as meadows, hedgerows and abandoned areas – even in the city.

The main ingredient for this is lambsquarters. This particular weed is most prolific, and as I tidy up my vegetable plots I still have to throw out the bulk of it. I have taken to drying it for use in the winter – in the dehydrator, the oven (at a very low temperature) and even on the dashboard of any vehicle parked in the sun, the most economical method of all. But be careful – vehicles can get really hot, so I had to stir them every hour or so to prevent from burning.

DSC03112

I also used young goutweed leaves (top left) to give it a herbal flavour, and some plantain (on the right). The lambsquarters are below the goutweed. At the last minute, after taking this shot, I added dandelion leaves.

DSC03168

All these mixed with some seasonings and topped with eggs made for an easy, inexpensive and super nutritious meal – and yes, even delicious! You can add more spices and herbs as you choose, and mix and match whichever wild greens you have growing. This is how I did it.

Foraged Greens and Eggs

Ingredients

3 Tbsp olive oil

1 onion, chopped

4 cloves garlic, chopped

1 Tbsp chopped green chili pepper

1 tsp cumin powder

salt and pepper to taste

4 cups lambsquarters

1/2 cup goutweed leaves (only the young ones from plants which have not yet flowered)

a handful of dandelion leaves

1/2 cup plantain leaves

4 eggs

Method

If using plantain, boil it in water for four minutes, drain and set aside. It is tougher than the other greens and will blend with them better if cooked longer.

Fry the onion until translucent. Add the garlic and chili and fry another couple of minutes. Add the cumin, salt and pepper. Add enough water to the pan just to barely cover the bottom of the pan. Stir in all the greens and cook at medium heat until they have all wilted completely and the water has evaporated. Break four eggs on top of the mixture, cover the pot with a lid and allow to simmer for about 4 minutes, or until the eggs have cooked sufficiently. Remove from the heat and serve. I sprinkled a little sumac powder on top for garnish.

DSC03169

DSC03171

Linked to Fiesta Friday #129; The Not So Creative Cook and Faith, Hope, Love and Luck.


15 Comments

Fermented Wild Grape Leaves

I couldn’t let this season pass without giving a nod to my signature ingredient – wild grapes. Who knows if there will be any grape harvest with the serious drought we have been experiencing, but the leaves are as lush as ever and begging to be picked. You can read about how to identify them, where to find them and why you would want to here.

Always looking for new ideas, I decided this year to ferment them. Fermenting is arguably the most healthful way of prolonging their shelf life, provided they are stored properly. The flavour also gets a boost, – no disappointment there.DSC03139.JPG

The only consideration is they do need some acid added to them, so I decided to use a combination of fresh lemon juice and a little liquid from a previous ferment – in this case wild apples. For every two cups of water, I used a heaping tablespoon of salt, the juice of one half lemon and a tablespoon of liquid from fermented apples. If you don’t have any fermented liquid, just double the amount of lemon juice. After removing any trace of stem, I stacked the leaves in piles of five, rolled them like cigars, and placed them in a mason jar. I poured the brine over them to cover and allowed them to sit at room temperature for six days. It is important to keep the leaves completely submerged, so I used a porcelain egg cup, placed upside down on top as a weight. By the sixth day, shorter or longer depending on the room temperature, the bubbling will subside and the liquid will have a good, tart taste. At that point, put a lid on them and store in a dark, cool place. I do not recommend using a square jar like mine as round ones are safer – less likely to succumb to any pressure built up, but I intend to open mine every few days to be on the safe side and let any gas escape. Even in a cool dark place, fermentation will continue so the occasional ‘burping’ is recommended if storing over a long period.

Fermented Wild Grape Leaves on Punk Domestics

Like any pickle or fermented vegetable, they are a great addition to salads and dips. They could also be filled and rolled like dolmas, something I intend to try next. I used some as a base to a quinoa salad, made with garden herbs, cooked sweet potato and fresh red currants. DSC03164.JPGRelated posts: Grape Leaves with Roasted Vegetables;  Pickerel in Grape Leaves; Quiche in Grape Leaf Shells; Grape Leaf, Herb and Yogurt Pie; Vegetarian Dolmas; Dolmas with Meat and Rice


14 Comments

Ramps Butter

DSC00645Ramps (aka wild garlic or leeks) season is here in Eastern Ontario, and the window for picking it is brief. To make things tougher for us ramps fans, care must be taken not to over harvest and deplete the crop for future years.

In order to lessen our impact from foraging, especially where growth is sparse, it is possible to just remove a leaf or two from each plant and leave the bulb in the ground so the plant will still be there next year. The leaves on their own are

A couple of years ago I transplanted a small clump into my garden where it is doing very well, but still not the acreage I am aiming for. However, a few leaves taken will do it no harm and anticipate a larger crop next year.DSC02995.JPG

To spread it as thin as possible, I decided to make a spread! Butter mixed with chopped steamed ramps leaves and a little fresh mint – other herbs or seasoning as desired. DSC03005.JPG

This is not only an excellent spread, but can also be used to add flavour to soups and sauces. Stay tuned!

Related posts: Fermented ramps; Ramps omelette


18 Comments

Puffball Mushroom Flour

DSC02591

I considered myself lucky this year when I found a healthy puffball behind my tool shed, and referred to it in a recent post on how to identify and use it in cooking. Now these puffballs are mushrooming all over, and by the number of posts from other blogs on the subject, it’s a good year not just in my garden. I recently found four more good sized balls, one of which I left to help ensure some spores remain for next year.

There is no point finding these gifts if you don’t know what to do with them. Their shelf life when fresh is short. Frying lightly and freezing is one option, and I have dehydrated some as well. But when faced with the quantity I had, I wanted to be able to store them in as efficient way as possible, meaning something that required little work and little space.

DSC02594

I started to search to see if anyone else had dehydrated them, and if so what they do with them. Forager Chef, one of my favourite foraging blogs gave me the answers I was looking for. He dehydrated them, ground them into a flour, and made a very appetizing looking gravy.

So I set about peeling and slicing my puffballs into thin slices resembling sliced bread. He suggests drying them in an oven with the light on which I tried. I also did some in my dehydrator at a low temperature – about 107 F or 42 C. The dehydrator took only about 12 hours – the oven three times longer. However you do it, the slices should still be white when dry and crisp. If the heat is too high they will brown and will affect the colour of the flour.

A really powerful food processor is all you need to turn them into flour in just a few moments, but lacking that I used a not so powerful processor followed by a few seconds in a coffee grinder for a finer powder. This last step can be done on an as-need basis.

DSC02606

I can think of several ways this flour can be used but so far have just tried Forager Chef’s mushroom gravy recipe. I adapted it for a small quantity since unlike him I am not cooking for large numbers.

I started by heating 1/2 cup mushroom flour and 1/4 cup of water. You need a good deep pan for this, as initially the flour will puff when stirred. Heat and stir until most of the water is absorbed and it resembles a roux. In another pan, mix 3 Tbsp of fat (i used a mixture of butter and olive oil) with 3 Tbsp of flour. Stir over a low heat, and gradually add 2 cups of stock. I used a vegetable stock which had good colour having prepared it with onion skins among other herbs and vegetables, but any meat, fowl or vegetable stock can be used. When the stock has thickened sufficiently, stir in the mushroom mixture and bring to just below boiling. Season with salt and white pepper.

DSC02616

This gravy was smooth and flavourful. I served it over some roasted vegetables from the garden.

DSC02618

Puffball Mushroom Flour on Punk Domestics

Because it is vegetarian, and could easily be vegan by omitting the butter, it is a very useful recipe to have, but good enough that there’s no need to be a vegetarian to enjoy.