Along the Grapevine


51 Comments

Turkish Delight


DSC01473

There is frost predicted in this region within the next day, so I am in some hurry to rescue as much from the garden as I can. And as I do that, I thank all of you who  have posted timely recipes on squash, kale, and the like – many of which we have enjoyed! It being Friday, I know that Angie’s guests will be bringing more treats from the garden – and elsewhere – to her 40th Fiesta Friday.

Among the plants I have harvested is my copious rose geranium and some feral apples, so Turkish delight seemed an obvious choice. I know this is not usually made with apples, but any fruit will do, and many recipes just call for flavouring, sugar and cornstarch, so this had to be better. The apples, being from an abandoned orchard, are not treated with chemicals, and although a little irregular looking, are perfect for cooking, even with the skin on. Once again, I decided to use honey to avoid excess of sugar, but I will admit that it overpowers the rose flavour somewhat. Another time, I would either use half honey and half sugar, or add more geranium leaves to the mixture.

DSC01462

Wild apple


DSC01468

Rose scented geranium plant

You could easily make this recipe with any fruit and flavouring, as well as chopped nuts. It is the cornstarch which gels it, so the pectin in the apples helps but is not essential. You could also use flavours like lemon, rosewater, pomegranate etc. instead of the geranium leaves.

How to Make Rose Scented Apple Honey Turkish Delight

Step 1. Cut the apples into large pieces and cover with water in a pan. I had enough to fill a large pot.  Add a handful of rose scented geranium leaves and simmer until the fruit is very soft. Strain and measure the liquid. I had 4 cups.

Step 2. Add by volume one half the amount of honey, or 2 cups for this amount.

Step 2. Boil this syrup down until it reaches the hard ball stage or 260 degrees F (125 C)

Step 3. While this is boiling, measure 1/2 cup of cornstarch, 1/2 tsp cream of tartar and blend it with 1 cup of water. Mix well.

Step 4. When the syrup is boiled down and the right temperature, add the cornstarch mixture and stir over medium heat for about 10-15 minutes. It will get very thick and dark.

Step 5. Pour into a pan lined with slightly oiled parchment paper. Cover with plastic wrap while it cools to prevent a crust forming. Allow to cool for 3-4 hours.

Step 6. Cut into squares and coat each square with a ratio of 1 cup icing (confectioner’s) sugar to 2 Tbsp cornstarch.

This makes approximately 25 pieces.

DSC01470

I will definitely be making some version of this recipe again, depending on the season and ingredients available.


28 Comments

Sponge Cakes with Crabapple and Sea-buckthorn Jelly

Someone who knew I wouldn’t let them go to waste gave me a few crabapples from her garden – small yellow ones about the size of cherries. There are so many ways I could have used them, but given the rich flavour and high pectin content of these mini fruits, I decided to make another jelly with them. Crabapple jelly is not worth writing about in itself, and it combines so well with other fruits and berries, I knew I could come up with an original recipe. I had been wanting to make sea-buckthorn jam or jelly too, and by using little crabapples I could do this without having to add any commercial pectin – or even make my own. If you are unfamiliar with this particular berry, please refer to this post. I also wanted to make a jelly with honey, since my Japanese quince honey paste was so successful.

DSC01435 DSC01441

For Angie’s Fiesta Friday #39, I wanted to showcase this gorgeous jelly in a way that would get her guests’ attention, but with a recipe that would fit into our household’s diet. We don’t consume much cake, but if it is something I can put part of in the freezer for an emergency, it takes away the guilt of either over-eating or over-wasting. So I decided to make a very plain Victorian sponge and jazz it up by filling it with my jelly. No rich icing, no butter or oil, just a light fluffy casing for the best jelly ever!

To make the jelly, I used 2 parts by volume of crabapples and 1 part sea-buckthorn. If you are curious as to what sea-buckthorn is, refer to this post.

DSC01442

No need to peel, core or even remove the stems from the apples. I simmered the apples keeping them well covered with water at all times. Once they were really soft, I added the berries and simmered just a couple of minutes longer. Other berries could be used with this same method.

I strained the mixture through a clean tea towel and let sit overnight. Do not press any of the pulp through. I measured the liquid and added an equal amount of honey. At this point, you should taste it for sweetness, and the amount of honey you need will vary depending on the sweetness of the fruit and berries. Don’t get carried away though, because too much sweetening tends to detract from the taste of the main ingredients.

Allow the mixture to simmer until it is jelled. To check, I put a small amount in a chilled saucer (or in my case egg cup) and let it sit a couple of minutes. When it has reached the right consistency, set to cool.

Instead of a murky orange mixture which I was expecting, it turned out deep red and very clear. You can taste all three ingredients, and they meld very well together. It has a stronger flavour than most fruit jellies I have tried, but no hint of bitterness at all.

You can use any sponge cake recipe, but I used gluten-free cornflour. To make this cake, you will need 3 whole eggs, 1/2 cup sugar, 3/4 cup of cornflour, 1 tsp of baking powder and 1/4 tsp salt. I also added a couple of cardamom seeds (optional), which I ground with the sugar for a super fine consistency.

Beat the eggs a lot, until they are really fluffy. Add the ground sugar gradually while still beating, making sure the sugar dissolves after each addition. Sift and fold in the dry ingredients. Fill 12  individual cake liners about three quarters full.  Drop a spoonful of jelly on top of each cake. The jelly will sink, so no need to cover them. Bake at 350 F for half an hour until crisp and golden on top.

Dust with a little icing sugar if you like just to make them a little prettier. If you want an entire cake, you could bake it in a cake tin, slice in two when cool and spread the jelly in the middle in a sandwich form. This would be a better way to preserve the integrity of the jelly, which when baked got partially absorbed into the spongy batter.

DSC01444

DSC01447


19 Comments

Japanese Quince Paste

DSC01410

Japanese quinces of varying colours, sizes and shapes, all from one plant

I posted two recipes last year using Japanese quince (chaenomeles) – for jelly and chutney. Both were delicious, and I hoped to find more of this wonderful, seldom-used fruit to continue experimenting with it.

Japanese  Quince Paste on Punk Domestics

The more traditional quince (cydonia oblonga) is not commonly used here, so it is no surprise that this Asian variety is even less popular. It is grown for its beautiful flowers early in the spring, and the fruit are usually left to fall and rot on the ground. If you have one of these shrubs, you could not be blamed for considering the hard, irregularly shaped fruit was inedible. But once cooked, its lemony flavour is apparent, and it can be used in any recipe calling for quince. Even raw, it has a wonderful scent.

If you don’t have one of these shrubs, you will have difficulty finding the fruits since they are not sold in markets, but it is not impossible. You may know someone who has the plant and will spare you a few fruits, especially if they don’t know how good they really are. They are such hardy little shrubs, they are sometimes left standing in what once was a garden and now abandoned. I am still in the position of having to collect them from other people’s gardens, but I did successfully germinate some seeds from last year’s bunch, and if they survive this winter outside (their first), I may have my own fruit producing bushes soon. And just in case, I am going to repeat the process again this year with some carefully preserved seeds.

DSC01411

Young quince shrubs in a pot

I decided this time to make a quince paste – a popular dish of Spanish and Portuguese origin, usually made with the actual quince. Based on the success of the jelly I made, I found the level of pectin is very high, like in quinces, and just sugar, fruit and water are required for a well-set jelly. I decided to use honey instead of sugar, because with all the preserving and jelly making I’m doing, I’m using too much sugar. As I was not sure if this would work, I decided to make a small amount first, so used just half a vanilla pod.  Now that first batch has been such a success, I might vary the recipe a little and try adding some other flavours, but meanwhile here is my recipe. Note, you do not have to peel or core them, just chop them in large bite-sized pieces.

DSC01416

Cooked Japanese quinces in a food mill

DSC01417

Strained quinces

Japanese Quince Paste


Ingredients

Japanese quinces, chopped  in quarters (I used about 4 cups)

Water

Vanilla pod

honey or sugar

Method

Put the chopped quinces in a saucepan with a piece of vanilla pod and cover with water. Heat to boiling and then simmer until they are all fully cooked and soft, about 1/2 hour. Put them through a food mill. If using sugar, measure 1 cup of sugar for each cup of pulp. If using honey, use only 3/4 that amount because it is sweeter. Continue cooking on low heat, stirring often to avoid sticking. The mixture will thicken and get darker. After about 1/2 an hour to 45 min., the bubbles will become audible, and look sort of like lava in a volcano erupting.

At this point, pour it into a shallow pan lined with lightly buttered parchment paper and allow to cool.

DSC01420

Quince paste cooling

DSC01425

Quince paste with cheddar cheese

Usually served with cheese (manchego in Spain), this sweet goes well with most cheeses. Or try it simply with toast for breakfast.

It can be kept for several weeks covered in the fridge, or wrap it and freeze it for longer to enjoy all winter long.


38 Comments

Walnut and Sumac Eggplant Rolls

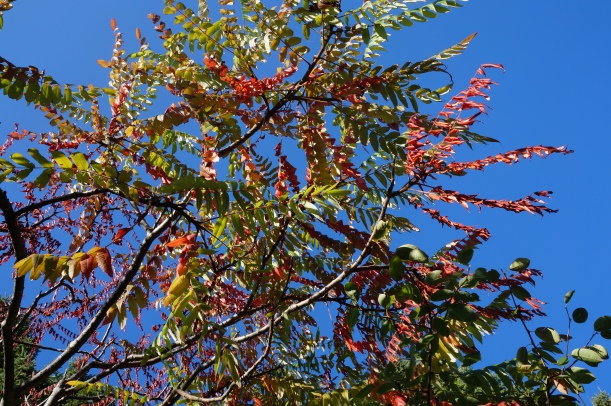
The sumac shrubs are at their height now in terms of colour. There are masses of them along the roadside, but I decided to photograph my own for this post. The first one is the focal point in one of my flower beds, and the others are just little shrubs growing next to the shed.

DSC01371DSC01372

I need to collect more of the berries, but the weather has been so wet, I have to wait until they are drier, as they lose some of their flavour when rained on. We might need to reach freezing temperatures before they are pickable, but at least it will be dry, and the berries will wait. If you need any information regarding sumac, please refer to this post.

Meanwhile, I used some of my store of powdered sumac to use in this recipe using walnuts and eggplant (or aubergine). It is a very popular Georgian recipe which I discovered in Russia. I was told the stuffing was made with just ground walnuts, but additions can be and are made. In Georgia, there are often several spices added, and sometimes petals of edible flowers to give it some colour. I have made it many times, always trying to duplicate the distinct flavour of the ones I bought in the Russian market. This is the recipe I came up with.

DSC01362

Walnut and Sumac Eggplant Rolls

  • Servings: approx. 10 rolls
  • Print

Ingredients

2 medium eggplants

oil for frying

1 cup walnuts

1 clove garlic

2 Tbsp rice wine vinegar

1/2 tsp fenugreek

1 Tbsp sumac powder

Method

Slice the eggplants (skin on) lengthwise  about 1/4 inch thick

Place them in a shallow dish and sprinkle liberally with salt. Leave them for 30 minutes to 2 hours. Rinse the salt off completely, and pat dry.

This step can be omitted, but it helps to remove any bitterness from the eggplant. Because I always detect some salt even after rinsing them, I did not put salt in the recipe.

Fry each piece in some oil on both sides until they are lightly browned and cooked right through.

For the paste, put all the ingredients in a food processor and blitz really well until it all holds together. If it is too crumbly, add a few drops more vinegar.

Place a spoonful of the walnut mixture along the base of the aubergine slice and roll up.

That’s it! These little rolls are a great appetizer, picnic food or served with a salad or rustic bread. They are eaten either chilled or at room temperature, which is how I prefer them. I wish I could describe how they taste, so much better than the sum of their parts, but there are no words that convey their distinct flavour.

DSC01366

I am bringing these tasty appetizers to Angie’s 38th fabulous Fiesta Friday. I hope you will drop by this virtual party, and if you have a dish you would like to bring along, click here for the simple instructions.


Leave a comment

Harvesting the Seeds

Most of the summer’s harvest has already been brought in, with the exception of potatoes, leeks and a few tough greens, so the gardener (me) has a  little more leisure at this time of year. Of course, there is some clean-up required, but that can wait. The forager (also me) still  has plenty on her plate. I won’t even attempt to list all the things I should be out there harvesting, if it ever stops raining long enough. But one activity I have indulged in is harvesting the great crop of seeds I have – the usual garden produce of course, but also some of the weeds, perennials and self seeding flowers. If you want to be ready in the spring to plant your best garden ever, collecting seeds makes a lot of sense. I must have about a million cosmos seeds which I hope to spread through all our fallow fields. Maybe!

DSC01356

It also occurred to me that for people with less space to broadcast millions of seeds, it also makes a lot of sense to select a few seeds to be saved for the spring. They can be planted in pots and set on patios, window sills or wherever you choose. There are some plants which are particularly suited for this purpose, and will give you every bit as much beauty as the store-bought annuals – they can even be planted along with for a little ‘diversity’. They will also provide you with the wherewithal to do a little safe foraging without having to leave the comfort of your home. Foraging is not just for the intrepid.

Some of the best plants for potting are herbs – and every kitchen needs a few of those. But beyond that, I would recommend the following, all of which have at least one edible part:

anise hyssop – for its leaves and flowers

DSC01219

red amaranth – for its deep red leaves

DSC01308

milkweed – to attract monarch butterflies, for its flowers and seed pods

DSC00988

flax – for its blue flowers and seeds

DSC01370

perennial arugula – for its peppery leaves and decorative edible flowers

DSC01353

If you have enough of some of these plants, the seeds can also be collected, dried and used in cooking. This can be a tedious job, and one I don’t usually recommend. I have tried the usual method, of spilling them from one plate on to another in a breezy spot, but too many seeds were lost in the process. However, I did lately discover a very easy method for collecting and winnowing flax seeds. It requires quite a few seeds, some time in picking them but after that it is so easy with my, I believe, original method.

DSC01354

This large patch of flax is going to seed gradually. You can see in the photo the little beige seed pods which are ready to be picked. I gathered a few of these.

DSC01358

I put them in a blender and chopped them up as much as possible. If you have ever tried to grind flax seeds in a blender, you will know it has no effect on the seeds. For their pods and whatnot, it is another matter. I just blended until I had a fluffy mass of seed pods.

Then I took them outside where luckily there was a nice breeze, or maybe it was even wind. I put a deep bowl on the ground and poured the fluff through a funnel, held about two feet above the bowl. Unfortunately, I was unable to take a picture of myself doing this, but as the mixture fell through the funnel, a great cloud of seed covering was seen floating off into the atmosphere. After one try, the seeds were pretty clean, but I repeated this two more times and ended up with these seeds.

DSC01359


This method did not work so well with the amaranth seeds I tried. If you know of any easy, practical method of winnowing seeds, please do share.


61 Comments

Coconut Lime Jerusalem Artichoke Chips

DSC01305

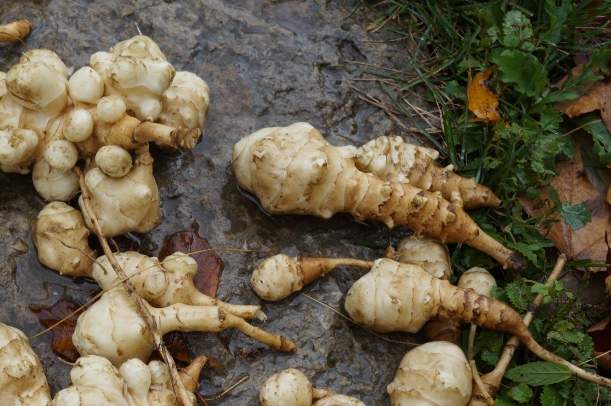
I made Jerusalem artichoke (or sunchoke) chips last year, and was so pleased with the result that I had to try it again this year, now that the tubers are ripe for digging up. They should be even sweeter after a little more frost, but if I wait too long, the ground will be too hard and many will go to waste. These vegetables are not usually eaten in large quantities, but a few little crispy chips are really very easy to eat, and unless you overdo it, you should not have any ill effects. Fried snacks should only be eaten in moderation anyway.

If you are not familiar with these, you might see them in some farmers’ markets and good grocery stores at this time of year. They are not really artichokes, but rather of the sunflower family, and have a distinctive artichoke flavour. They grow beautifully in a sunny area, produce year after year with absolutely no care whatsoever, and provide bright yellow flowers in the fall when most other flowers are shutting down. Roasted, boiled or fried, they make a delicious side dish, but I dry most of mine, which makes storing them easy. Once dried and ground into flour, they make a great thickener for sauces and can be added to lots of savoury baked recipes.

DSC01298

I am bringing these chips flavoured with lime and coconut oil to Angie’s 37th Fiesta Friday, which I will be co-hosting with fellow-Canadian and co-host extraordinaire Julianna of Foodie on Board. Feel free to visit Angie’s site, and see what the guests bring this week. If you are still looking for some original recipes for your Canadian Thanksgiving dinner this weekend, I am sure you will find something perfect for the occasion.  Should you wish to bring a dish along to the party, first read the guidelines here.

To make the chips, just follow these steps:

1. Slice the Jerusalem artichokes very thinly, as you would for potato chips. If they are fresh, no need to peel, just give them a good scrub. If the skin has become brown and thicker, then it should be removed.

2. Place in a bowl and pour freshly squeezed lime juice over them so that each slice is covered, and add a little grated lime zest for extra flavour.

3. Place them on a baking tray and put in a barely warm oven until they are no longer soaking wet. They will still feel damp, but most of the juice will have evaporated.

4. Heat the coconut oil, and fry just a few at a time, until they are golden brown. Remove and drain on absorbent paper.

5. Serve while still warm. If they are left at room temperature for a while, they will lose their crispness, in which case just reheat briefly in the oven on a tray until they crisp up again.

DSC01335

The flavour of lime makes these Jerusalem artichoke chips extra delicious, although lemon could also be used. They don’t even really need salt.


13 Comments

Maple Leaf Fritters


DSC01309DSC01313

Our lawn is covered in mostly brown leaves which have fallen from our sugar maples on the front lawn. Except for a few which I will rake up to cover some of my delicate plants, they will stay there till spring, get chopped up in the first mowing, and return to the ground as a kind of natural fertilizer. It never had occurred to me to collect any of these leaves as a source of food until I came across this article about a Japanese recipe for fried maple leaves in a sweet tempura batter. In this article they had the advantage of Japanese maple, which is a much more defined leaf, but I decided to use what I have, which is sugar maple. If you have Japanese maple leaves, you might want to try them – the result is so pretty. Just look at those pictures.

I was understandably hesitant, and did a fair amount of research before undertaking this experiment. I found no references to maple leaves being poisonous to people, but some are very bad for horses. If you at all curious or doubtful about the wisdom of  ingesting these, you might want to look into it further. This article and this one are a good place to start. Continue reading


28 Comments

Sea Buckthorn leather: A Roll-up for Grown-ups!

DSC01282

Berries on female bush

This is my third post in a row using berries. The first were juicy sweet blue black nannyberries, the second sour red sumac, and this one is a bitter sweet bright orange sea-buckthorn, or hippophae rhamnoidas.

DSC01283

Male bush

This is a berry I began using when living in Russia and Central Asia, and one I thought I would miss when I returned home. Luckily by then (2007), the cultivation of this had finally arrived in the new world, and although it is far from common, I am sure you will begin finding it in good farmers’ markets before long if you haven’t already. And when you do, I hope my ideas will inspire you to give it a try. Since it can be grown in a cold climate like ours, perhaps people will realize we don’t always need exotic berries from other continents to enhance our diets. How nutritious is it? Just let me say that Ghengis Khan used it as nourishment for his army!

I first came across it at a garlic festival in Perth Ontario, and shortly after found some shrubs at a nursery in the east end of Ottawa. That was about 6 years ago. I have now had two harvests from my three surviving female bushes – I have only one male but he is doing his job well on his own.

I should clarify for those who are turned off the word buckthorn – a nasty, invasive plant that grows around here. This is not a buckthorn really, and have no idea why it has been given that off-putting name. As for the prefix sea, it is not because it grows near the sea. I don’t know for certain, but perhaps it is named so because when you see fields of it blowing in the wind, the delicate silver-green undersides of the leaves make the plants look like waves on the sea. That is just my humble thought.

DSC01286

Bushes blowing in the wind

You are most likely to find this berry as an ingredient in health and beauty products, and it is being touted by some as the greatest superfood out there. I prefer mine unprocessed, and eat it either fresh or steeped in hot water. The flavour is so intense, you can use the same bunch of berries for several infusions. If you find the flavour too strong, it could be mixed with sweet fruits, like apples, pears or peaches.

DSC01285

For this week’s Fiesta Friday, I decided to make a fruit leather. I have never made, or even bought or eaten fruit leather, but this seemed like a good time to start. I collected 6 cups of berries, then strained them through my apple sauce mill, but you could also use a blender or food processor and then strain. I mixed the juice with 3 Tbsp of liquid honey and poured it into a lightly greased, parchment lined cookie tin. I put it in the oven a 170 F for about three hours, at which time I noticed the carroty orange colour was getting darker, but it looked too runny for comfort. I therefore sprinkled evenly on top 3 Tbsp of chia seeds, hoping that would absorb the extra liquid. I returned it to the oven for another 9 hours, at which point the fruit could be peeled easily off the parchment, but it was still flexible and soft.

DSC01290

It has a soft and chewy texture a very intense flavour, tart like a lemon but caramelized. For a less intense flavour, I would mix it with a sweet fruit, or add just a little to any other fruit leather recipe.

A big thank you to Angie and her co-hosts Selma and Elaine. A little tardy this week, I am heading over there now to see what treats await me.


24 Comments

Staghorn Sumac: Is it Really Edible?

DSC01271

For those of you who are familiar with the foraged ingredients I use, you will already be familiar with my use of sumac, in powder and liquid form. It is such a versatile flavouring, often replacing imported ingredients like  lemon or pomegranate in sweet or savoury dishes. However, I continue to meet people who are very skeptical, if not terrified of using this fruit, so I thought it worthwhile to review my earlier posts and offer further information on the plant before I create any more recipes with it.

DSC01272DSC01277

The reluctance to try sumac is understandable. It is often paired with the word ‘poison’, as in ‘poison sumac’ which contains the same irritant as poison ivy, and we know how nasty that can be. I have not identified any poison sumac in this area, so have no photos to share, but the berries of the poison sumac are white, and the leaves are  more oval in shape, with hairless stems. For some really good illustrations of the poison variety, visit this site.

What is it? Rhus typhina, velvet or staghorn sumac of the Anacardiaceae family, to which mango, cashews and poison ivy all belong. It is a shrub which can grow to several metres in height.

Where does it grow? Native to the northeastern part of North America, it is found in open places, along roadsides, edges of forests, and often in my flower garden.  There are other ‘rhus’ varieties, all with red flowers, and all edible. If you do not have staghorn sumac in your area, you might have one of these other rhuses which might be worth investigating.

How to identify it: Its distinctive soft velvety stalks, which give it its name, distinguish it before the berries appear. The berries, which ripen in late summer and fall are a deep red which makes it stand out.  For some beautiful photos of this plant at all stages of its life, see this site, and you will have little difficulty identifying it when you come across it.

When to pick it: As soon as the berries turn a dark red in the late summer, the entire cluster can be snapped or cut off. They can be picked right into winter, but the colour is not as brilliant. Do not pick it shortly after a rainfall, as the rain washes off the malic acid, which is what gives them their tart flavour.

How to preserve it:  Scrape the berries off without washing, and cover with water. Some directions say to put them in room temperature water, and allow to sit in the sun to make a tea or lemonade – others say to put them in hot water. I have simmered them to get out the maximum flavour, but you should avoid boiling as this can cause it to be bitter because it releases the tannic acid. Strain the liquid through a cloth to remove any of the little hairs. Alternatively, the scraped off berries can be dried, chopped in a blender or food processor and strained through a fine sieve for a powder.

What to do with it: Many Middle Eastern recipes call for sumac powder, and this North American variety is indistinguishable in flavour. The tea concoction can be taken just as is, possibly with sweetener added. The tea can be made more concentrated too, and then used like a pomegranate molasses.

Here are some of my favourite recipes using sumac.

Fesenjun,  a Persian dish traditionally made with chicken (or meat) in a pomegranate and walnut sauce.

100_0672

Sumac Meringu Pie based on a recipe for lemon meringue pie

DSC00365

Portobello Mushrooms  grilled with sumac and balsamic vinegar

DSC00133

Za’atar, a mixture of herbs, seeds and sumac used in Middle Eastern cuisine.

DSC00159

So now that sumac season is upon us, I look forward to finding some new recipes to share. In the meantime, I hope I have removed some of the scare factor from this versatile, tasty and plentiful ingredient. If you have any recipes to add, I would love to hear about them.
div align=”center”>Nannyberry sauce on Punk Domestics