Along the Grapevine


5 Comments

Cedar Jelly

If you are one who enjoys grilled game, fish or fowl, this aromatic jelly is for you. And if you’re not one to consume any of those, you will still enjoy this with cheese and bagels, or simply on toasted sourdough bread. Either way it is a perfect condiment for any larder. 

Even knowing that cedar is one of the many flavourful and scented evergreens native to this region, I have hesitated to use it up till now. It contains a chemical called thuja which should not be consumed in large quantities, and definitely should be avoided by pregnant and nursing women. Recently I watched a cooking show about pre-colonial recipes, and noticed they used a cedar jelly as an accompaniment to game, so I figured that the quantities of thuja in this had to be tolerable. On further researching, I discovered that there are several greens which contain this chemical, most notably juniper, some mints and sage, all of which are found in most cooks’ pantries.  I also learned that early settlers used the leaves to make tea to prevent scurvy, and many campers continue to use it as an available source for a tasty drink. I therefore concluded that making a cedar jelly recipe to be consumed occasionally in small amounts would be delicious and safe, as long as you are not pregnant or nursing.

The cedar tree I am referring to is one that is commonly found in the north eastern parts of North America – the eastern white cedar. There is a similar western version, but I am only familiar with the one from this zone. It is a fast growing, hardy conifer favoured in landscaping but also easy to find in the wild. Its small scaly leaves cover the fan-shaped twigs and vary from yellowish to deep green. Its small cones grow in clumps of five or six pairs.

DSC03419.JPGThree things to note about cooking with these leaves are:

keep the simmering or steeping mixture covered to prevent the volatile oils from escaping;

use only the lighter green tips growing from sill-green branches;

the longer the cooking process, the more flavour will be lost.

So bearing these  in mind, here is the recipe I came up with.

Cedar Jelly

Ingredients

2 cups cedar leaves

2 cups water

2 cups sugar

juice of 1 lemon

1 pkg (85 ml) liquid pectin

Method

Place the leaves and water in a jar and press the leaves down to submerge. Cover with a lid and set in the sun for at least four hours. This will extract a good amount of flavour without cooking it.

Strain the liquid, add the sugar, lemon and pectin. Bring to a boil and simmer for about 10 minutes, until foam forms on the top. Skim off the foam and bottle.

To date, I have no way of measuring the ph level for purposes of canning, so I am just freezing as my method of storing. This recipe makes three 8 oz jars.

DSC03439.JPG

Linked to: Fiesta Friday #184; Food Eat Love; The Not So Creative Cook.


10 Comments

Milkweed Pakoras

Here’s a simple recipe using wild milkweed blossoms and/or pods and transforming them into an exotic snack. A simple chickpea flour batter and a little oil for frying is all you need. If you don’t have access to milkweed, this recipe can be used for any edible wild leaves, shoots or flower buds.

DSC00932

I’ve noticed a good amount of traffic at this time of year to all posts milkweed related, which means there are those who are foraging for these plants and interested in learning new ways to use them. If you are new to this, please refer to this post here  and here for identification and precautions. Remember that they are an important food source for pollinators, especially monarch butterflies, so avoid excessive harvesting.

I currently have plants at every stage of growth which is why I was able to pick both blossoms (unopened and green) and pods (around 1 inch in length). The pods need to be immersed in boiling water for at least three minutes, and to be on the safe side I left them for five, drained them and ran cold water over them immediately.

DSC00988

DSC00873

I made a simple chickpea flour batter, salt and chili powder (optional) to taste and enough water to make a batter. Less water will give a doughier batter – I opted for a thin batter in order not to mask the shape and colour of the blossoms.  Coat the flowers and pods with the batter, fry a few at a time in hot oil until crisp and golden. Remove and allow to drain on paper towels for a few minutes. 

DSC03422

Serve with a dipping sauce of your choice. I prepared a mixture of tamarind, chili, jaggery and other spices for a piquant Indian flavour.

Related posts: Cooking with Milkweed Pods;  Milkweed Flower and Lambsquarters Soup; Milkweed Flowers; Milkweed Bud Fetuccine; Stuffed Milkweed Pods; Spicy Roasted Milkweed Pods

Linked to: Fiesta Friday #182;  Spades, Spatulas and Spoons and Jenny is Baking.


8 Comments

Dandelion Cake

DSC03373The nutritional value of the dandelion is becoming increasingly understood, yet the number of appetizing ways to use the plant are still rare. While the flowers are not the richest source of nutrients compared to the roots and leaves, they do contain some health benefits, including antioxidants and vitamins A and B12. For more about the flower as a food source, this article is worth reading.

I just finished making a syrup from dandelion flowers which I found so good I already have a second batch on the go. I have used it to make a cocktail and a sourdough fruit bread, adding some to the batter as well as a glaze when it came out of the oven.

DSC03370

The recipe in this post was inspired by a recipe for revani, a Greek cake soaked in syrup after baking.  I found this recipe in my newest cookbook called “Three Sisters – Back to the Beginning” by Betty, Eleni and Samanth Bakopoulos which I noticed has just been shortlisted in the Taste Canada awards. Their cake calls for coarse semolina, which I substituted with casava which has a similar texture, but either can be used. It also calls for orange and lemon zest, but of course I didn’t need those with my own fresh and local dandelions, both in the form of petals and syrup. It makes a pretty dense cake, something like cornbread, and is sweetened mostly by the syrup which is poured over it right after baking. The cake could have absorbed more than the cup of syrup I used, so if you want a really sweet dessert, add another cup.

Dandelion

Ingredients

1 cup butter

1/2 cup sugar

1/4 cup dandelion petals (approx. 12 flowers)

5 eggs

1/4 tsp vanilla

2 cups casava flour or coarse semolina

1 cup flour

1 tsp baking soda

1 cup dandelion syrup
Method
Cream the butter with the sugar and petals. Add the eggs, one at a time and beat well after each addition. Mix the dry ingredients together and add to the batter, beating well. Pour into a greased 9 inch square pan and bake at 350 degrees F. for about 30 minutes. Remove from the oven and immediately cut it into serving size pieces. Pour the cooled syrup over it slowly, letting it be absorbed by the hot cake gradually.

DSC03374.JPG

Linked to Fiesta Friday #171


14 Comments

Honeysuckle Ice Cream

The flavour of honeysuckle is, as the name suggests, just like honey. And like honey, it can be used to flavour so many desserts, at least as long as the short season allows. If you have a good source of this late spring flower, here is just one way to enjoy its sweetness.DSC03091.JPGI only discovered the honeysuckle growing on our property a couple of years ago, and this year the number of bushes seems to have multiplied. I don’t really believe that is possible – probably I just am able to distinguish them more easily from the masses of lilacs that bloom around the same time because now I know they’re there. In fact, I have spotted honeysuckle regularly on the road, most of the way between here in E. Ontario and New York City, so I know our garden is no exception.DSC02122

Last year I accidentally made a honeysuckle syrup which has been used to flavour many a dessert since then. However, for blog purposes I wanted to come up with something different this year,  and ice cream seemed a good choice. It did not give me the rich red colour of my syrup, or any colour at all to speak of. Next time I will add a few hibiscus petals to brighten the colour. But the flavour was a resounding success, and the idea of honey flavoured ice cream is too good to abandon on account of lack of colour.

Speaking of colour, I did not use a custard base recipe because I didn’t want the egg colour to overwhelm the pink, although if you have yellow honeysuckle, it would be a good choice. The recipe I came up with is kind of a hybrid of frozen yogurt and ice cream, and it was the softest, creamiest ice cream I’ve had yet. And perhaps the easiest I have ever made.

Honeysuckle Ice Cream

Ingredients

2 cups 20% cream

1 1/2 cups sugar

2 cups honeysuckle flowers

1 cup yogurt (preferably full fat)

Method

Heat the cream and sugar until the mixture steams a little but does not boil. Stir constantly to dissolve the sugar. Mix the flowers into the hot liquid and allow them to infuse for a few hours (I left them overnight) in the fridge.

Strain the yogurt through a cloth lined sieve. To speed up this process I put a heavy bowl on top. Strain the flower mixture and add the yogurt to the liquid. Process in an ice cream maker. If you don’t have one, just pour it into a cold bowl, put it in the freezer and stir vigorously every 30 minutes until it is frozen through.

DSC03095

Linked to Fiesta Friday #122, Frugal Hausfrau, and Aharam. Thank you to Angie, Mollie and Aruna for hosting this week’s event.

Related posts: Salted Caramel Ice Cream; Olive Oil Ice Cream with Balsamic Wild Strawberries; Anise Hyssop and Peach Ice Cream; Rhubarb Ginger Ice Cream; Sea Buckthorn Gelato


14 Comments

Savoury Ramps Pastries

DSC03053
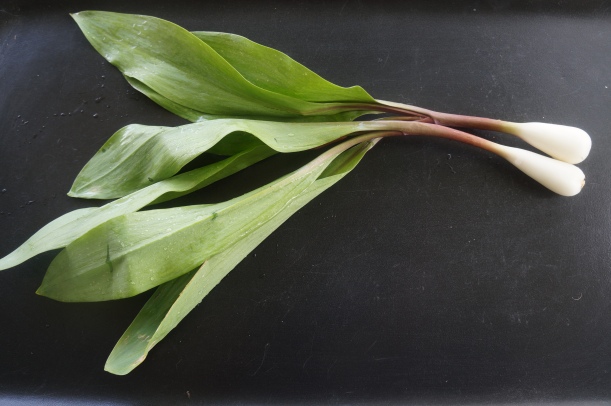
This is turning out to be a great year for ramps (aka wild leeks or wild garlic). The cool weather has prolonged the season and I had the good fortune to have access to a bonanza of this seasonal delicacy on the property of a kind and gracious friend. If you don’t have access to them, you are likely to find them at good markets in any area where they are grown. For information on how to identify and pick them refer to this post here.DSC03059.JPG

I used a good bunch of them to ferment, perhaps my favourite use of them, but with so many I had the perfect opportunity to devise a new recipe. Sauteed ramps mixed with eggs and bechamel baked in a puff pastry made a simple yet elegant appetizer. No need for any extraneous ingredients – the ramps work just fine on their own.

Savoury Ramps Pastries

Ingredients

3 Tpsp olive oil

6 cups ramps, chopped

2 Tbsp butter

2 Tbsp flour

1 cup milk

4 eggs

1 tsp salt

black pepper to taste

1 pound puff pastry dough

Method

Sautee the ramps in the oil until just cooked – about 2 minutes. Set aside to cool. Melt the butter in a saucepan, stir in the flour and gradually add the milk, continuing to stir and cook over a medium heat until the sauce thickens. Set aside to cool.

Divide the pastry in two and roll out each half on a floured surface to fit a pan measuring 9 x 12 inces (or equivalent). Line the pan with one half. Beat three eggs, then add the cream sauce, sauteed ramps, salt and pepper. Pour this mixture onto the pastry and cover with the second sheet. Secure the top edges to the bottom layer to prevent the top layer from shrinking. Brush the top with 1 beaten egg. Bake in a 400 degree F. oven for about half an hour, until the pastry is puffy and golden.

Cut the pastry in serving size pieces with a sharp knife.

DSC03062

This can be served warm or at room temperature, as a side, appetizer or main dish. It also freezes well and makes a perfect picnic treat.

Linked to Fiesta Friday, Safari of the Mind and Fabulous Fare Sisters.


12 Comments

Solomon Seal Shoots

polybi4

The best thing about foraging is that while all the gardeners are busy planting and fighting the weeds, we foragers are already enjoying some of the best harvest of the season. The dandelion greens are at their sweetest, roots easy to dig, nettles young and not too sting-y, edible flowers blooming and my lawn looks like a veritable smorgasbord. We don’t have to worry too much about what the weather does either – even after a blizzard this week, it only freshened up the wild edibles of the garden.

One of the spring treats I have been anticipating has just made its appearance.  After learning about the edibility and nutritional value of Solomon seal shoots, I was eager to give them a try. Especially as I noticed last summer that my scattered patches of the plant have spread alarmingly, and really do need some control. Their arching branches and drooping white flowers in the early summer are beautiful, and among the most popular with the hummingbirds (who needs feeders!) which is why they grow near the house, so cutting some shoots had to be done carefully, just as a little spring tidying.

Solomon Seal Shoots on Punk Domestics

True Solomon seal or Polygantum biflorum can be a tricky plant to  identify. The edible shoots have similar lookalikes, namely hosta and false solomon seal, both of which are also edible. The mature plant is not edible, except for the root which is used both as food and medicine but best left till autumn to harvest. It grows in shady, wooded areas, but unless you are sure of its identity, better to leave it alone.DSC02997

If you plant it in your garden or somewhere you can track it, there is no problem recognizing it when it first appears in the spring, before any leaves form. I pick them when still tight spears up to about 3 inches in height, and remove the one brownish layer around the base of the spear. Most sites I read referred to boiling them in water for 10 minutes, so I stuck with that advice. The flavour and texture is very much like asparagus, and can be served as a substitute.DSC02999

After harvesting the shoots, I cleaned them and dropped them in boiling water for the suggested 10 minutes. I then sauteed them lightly in a generous amount of butter mixed with ramps and mint. If you don’t have those greens, you can leave them out or substitute them with garlic or other herbs. To this mixture I added some cooked egg noodles. A little shaved parmesan can be added if you like, but for me the richness of the butter was adequate.DSC03003.JPG

And that is one way you can enjoy a delectable spring green long before even the earliest asparagus is up.

Linked to: Fiesta Friday; Frugal Hausfrau; Unwed Housewife


35 Comments

DSC02951
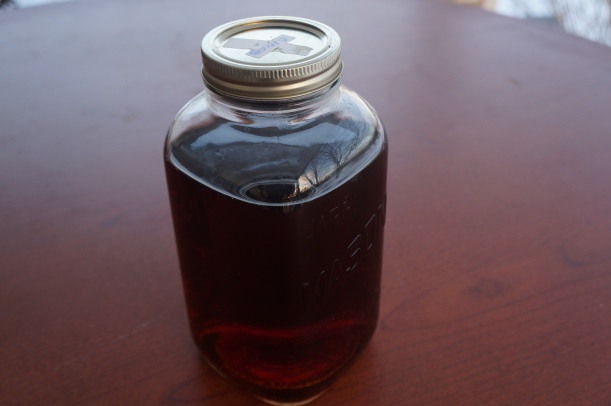
Until recently, bitters were just something I kept in the liquor cabinet for the odd occasion when a cocktail was called for. Since my lone bottle was not getting a lot of attention, I started to add it to some savoury recipes for a little extra zing. Without really understanding what bitters were, my ideas for its uses were somewhat limited.

Lately bitters have been garnering a lot more attention, and rightly so since they can enhance the flavour and aroma not only of cocktails but myriad dishes including pastries, desserts, grilled anything to name just a few. Once I realized the variety of flavours on the market (for example orange, lemon, coffee pecan, cardamom, celery) I determined to find out more about this promising concoction and how I could make my own.

So I bought a book. This one is by Brad Thomas Parsons and is called A Spirited History of a Classic Cure-All with Cocktails, Recipes & Formulas BITTERS. It is a riveting read about the convoluted history of this tonic, its uses, sources and how to make it. He offers a definition of bitters which I found very helpful to understand what to expect.

DSC02949

Bitters are an aromatic flavoring agent made from infusing roots, barks, fruit peels, seed, spices, herbs, flowers and botanicals in high-proof alcohol (or something glycerine).  … One of the biggest misconceptions about bitters is that  using them will make your drink bitter. Although this is understandable – tasted by themselves, bitters often taste slightly bitter or bittersweet – the term “bitters” refers not to a specific flavor but rather to the category of aromatic solutions made with bittering agents such as gentian root and cinchona bark. Bitters are essentially a liquid seasoning agent for drinks and even food…”

After reading several of the recipes, I figured I would have to tweak them as the ingredients were numerous, sometimes unknown, and often difficult to find. But tweaking works, as long as you have a combination of alcohol, principal flavour, bittering agents and and assortment of spices, herbs, flowers etc. These recipes also allow me to use some of my own cultivated or foraged plants, such as hops, wild cherry bark or dandelion leaves.

Since rhubarb season is soon upon us, I decided to follow the recipe for rhubarb bitters making a few changes according to what I had available. Since my rhubarb is greener than what is recommended, something that does not affect the taste, I decided to enhance the colour with a couple of reds, namely dried hibiscus petals and highbush cranberry sauce. Most of the unusual ingredients, like cinchona bark, can be found at a good herbalist’s, such as Herbie’s Herbs in Toronto.DSC02937

The basic method is to infuse the ingredients in alcohol (usually vodka, bourbon or rye) for two weeks. After straining this infusion, set the liquid aside and add some water to the solids and cook briefly. Allow that to sit another week. Strain and combine the two liquids. Add a little honey and allow to sit for another three days.

Rhubarb Bitters

Ingredients

2 cups chopped rhubarb

zest of 2 organic lemons

2 Tbsp highbush cranberry preserve

1/2 tsp coriander seeds

3 juniper berries

1 tsp fennel seeds

1/2 tsp cinchona bark

1 Tbsp dried hibiscus flowers

2 cups vodka

water

2 Tbsp honey

Method

Place all the ingredients except vodka, honey and water in a jar. Pour in the vodka and give it a good stir. Allow to sit for two weeks in a cool place away from direct sunlight, and give it a shake daily.

After two weeks, strain* out the liquid and set aside in a jar. Place the solids in a saucepan, cover with water, bring to a boil, reduce the heat, cover and simmer for ten minutes. Pour this mixture into a jar and store for a week out of direct sunlight and give it a shake daily.

Strain* this mixture, combine the two liquids in a jar and stir in the honey. Set aside for three days and again, shake daily.

*To strain, I first use a regular sieve to remove the majority of the solids, then I strain it through a funnel lined with a coffee filter. This takes some time, but the result is clear and requires no additional filtering.

Rhubarb Bitters on Punk Domestics

This same method can be used for virtually any combination of flavours – I look forward to creating more flavours using local and seasonal ingredients. This recipe makes about 2 cups of bitters. At first I thought this might be excessive, but having tried it I know I will have plenty of ways to use it, some of which I hope to share in future posts.

DSC02952

As a first taste test of the final results I made a very simple soda and bitters drink. I used about 1 oz. of bitters and 6 of soda, but mix according to your own taste. As Parsons explained, the result was far more aromatic than bitter, and a very light and pleasant drink.

Linked to Fiesta Friday #111, Naina at Spice in the City and Julianna at Foodie on Board.


15 Comments

Smooth Sumac – Rhus Glabra

DSC02836I have written several posts on staghorn sumac, by far the most common of the red-berried shrubs in this area but by no means the only edible variety. When I accidentally stumbled upon another variety, rhus glabra or smooth sumac, I was interested in finding out just what the differences between the two types is.

First I discovered that this smooth variety is actually more common throughout North America than the staghorn. It is also reputed to be more tart. Both varieties ripen in the late summer, but can be picked well into the winter and are perfect for foraging at this time of year.

The bushes are bare of leaves, so you have to rely on the berries to identify them. The smooth variety looks very much like the staghorn, but without the fuzz on either the berries or the stems. Here are pictures of both for comparison.

DSC02841

Just as I was contemplating writing this post, I came across an article extolling the medicinal properties of the rhus glabra. While my purpose in foraging is purely culinary, it is still of considerable interest to learn about the health benefits of any of the ingredients I use from the wild and this article helped me understand just what a remarkable plant I was dealing with. It is a wonder that with so much of it around it still remains unharvested.

I treated it the same as I did with the staghorn sumac. I placed the entire drupes in the oven in a single layer at a low temperature (170 degrees F) for a couple of hours until thoroughly dried. Then I remove as many berries as can be easily scraped off with a knife. These berries get finely ground in a spice or coffee mill, then passed through a sieve leaving a citrusy powder which can be used in everything from soup to nuts!

rhus glabra powder

Smooth Sumac on Punk Domestics

The remaining berries still attached to the drupes are placed in a large saucepan and covered with warm water and left to soak for about half an hour and then strained. In order to extract as much of the flavour and volume as possible, I give them a second soak in boiling water. This liquid can be used to make tea or sumac ‘lemonade’ which is the way it was most often used in these parts in the past.

DSC02851Perhaps my favourite way of using the liquid is by making sumac mead, although I will be publishing another drink recipe within a couple of days which gives a whole new purpose to collecting this prolific plant.


22 Comments

Foraged Wrappings

The presentation of gifts is an important part of the act of giving at this time of year, but it doesn’t hurt to be mindful of the waste we are creating and the fact that it is not necessary to use non-biodegradable papers and bobbles. This year I am using plain brown wrapping paper which if not reused can at least be composted. I have collected a few sprigs from the garden, and that combined with some ribbons I’ve collected over the years and snippets of disintegrated decorations serve well as wrapping.

If you are mailing and preparing things in advance, a stamp, pencil or a little paint will do well to brighten up the brown wrapping, but if you have the luxury of last-minute preparations, the things you find in the woods or garden are appropriate for the season, especially when you consider that is exactly what all the store-bought items are trying to mimic.

DSC02768

I have used red dogwood branches, sprigs of pine and cedar, cones, unidentified dried flowers and euonymus. Flowering grasses, silver dollars, nuts and holly, to name just a few, would also be good.

DSC02780

DSC02769

DSC02783

I did collect some beautiful twine for wrapping and a few other interesting bits, but they somehow got thrown out during a clean-up. Next year I’ll be more careful!

As for any leftovers, especially the evergreen, just pop them in a pot of water along with some spices and bits of citrus, heat on the stove as I did in this post, and you will have a beautiful potpourri to make you house smell super festive.

Linked to Fiesta Friday #99


16 Comments

Seasoning with Prickly Ash

DSC02560

I first took note of a prickly ash (zanthoxylum americanum) tree last spring when I noticed the cluster of green berries had a very enticing aroma. I had to find out what this bushy plant was before I tasted it, and when I identified it I learned it is not only edible, but a common ingredient in Chinese cuisine known as Szechwan pepper. Assuming the berries had to ripen before harvesting, I only recently got around to collecting a few and was keen to try cooking with them. What I didn’t realize was that the berries can be harvested any time there are leaves present, i.e. from mid-spring to late fall, so green, red, dark blue or black, they are all good.

DSC02565

First, a little about this tree or shrub. It grows mostly in shaded woods throughout much of central and north-eastern North America. There are closely related species elsewhere, such as the zanthoxylum bungeanum which is the one used in China and which has a similar taste. The plant can grow anywhere from 9 to 18 feet in height, and is usually part of a larger thicket.

It is belongs to the rutaceae (rue), or citrus family, which explains the lemony scent of the leaves. To help identify it, watch for these characteristics:

  • a smooth grey to brown bark dotted with small mounds with a couple of spikes on each
  • alternate compound leaves (5-11 on each) with a lemon scent and oval in shape
  • clusters of berries growing close to the branches, green in the spring, red in the summer and blue then black in the fall. When the seeds drop out the open husks remain
  • one or two hard, smooth black seeds inside the berries

A few of the berries I picked were still red, most were black, and many husks had lost their seeds but can be collected all the same.

DSC02567

I tasted some of the berries right off the tree. I was surprised by the flavour and the effect of eating them raw. A mixture of lemon and pepper was at first pleasant, followed by a numbing of lips and tongue – and I now understand why one of the many medicinal uses of this is for ‘dry mouth’. I found the experience slightly alarming, but hoped that roasting and/or cooking would eliminate the unpleasant effect but not the flavour.

For my first experiment, I decided to just grind one teaspoon of the berries coarsely and then roast them lightly in a skillet. I decided to pair them with nothing stronger than olive oil and crushed garlic, all of which I mixed together into a paste. I then applied a liberal coating to about one pound of chicken breast and roasted it. The flavour was as expected – citrussy and peppery and none of the anaesthetic or salivating effects were felt. I could have used a smaller amount and the flavour would still have been enough, but you will have to experiment a little yourself to find the right proportions for your palate. I believe with the addition of other spices, like cumin, ginger root, anise or chilis, a delicious ‘masala’ could be achieved.

I also roasted and ground some (a very small amount) and mixed it with ground dried garlic to season vegetables to be roasted. This method gave a very subtle flavour, a welcome alternative to black pepper (which does not grow in my backyard). With enough berries to keep me going for the winter, I will work on different spice mixtures using this newly discovered spice, and come spring I will be sure to start gathering them much earlier.

One word of caution though. These shrubs or trees are as the name suggests – very prickly. They are not difficult to pick and you can collect several in your hand at a time just be clutching a bunch, but dress to protect yourself from the thorns.

Seasoning with Prickly Ash on Punk Domestics