Along the Grapevine


23 Comments

Baby Beaver Tails

DSC01813

Before you leave, please don’t think I have been doing unspeakable things to baby beavers. Most residents of this region would know what I am referring to, but for the rest of you let me explain. Beaver tails are a fried yeast dough, popular especially at this time of year. They were first introduced in the Ontario town of Killaloe in 1978, and have since become a de rigueur winter treat, especially when out skating, especially on Ottawa’s Rideau Canal.

I was inspired to make some for two reasons. First, I am contemplating going skating on the Canal, the world’s largest outdoor, natural skating rink in a couple of days, and thinking I would have to have a beaver tail. After all, in this cold weather a 7.8 km skate calls for something, and that is what you get on the canal. That and hot chocolate.

The second reason is that tomorrow is Shrove Tuesday. It is traditional to eat pancakes on that day, but I figured a lot of other people would be making pancakes and I had nothing new to offer, so with my skate in mind I thought of beaver tails. I have made baby ones because the enormous ones they serve on the canal are just too much. Also, more small individual ones means more types of toppings. And the toppings are where it gets interesting. As soon as they come out of the pan, they are often sprinkled with cinnamon and sugar, but maple sugar, jams or preserves can also be used to sweeten them. Alternatively, savoury toppings like garlic butter or strong grated cheese are popular. I just sampled a couple with my own backyard fare – a sweet sumac butter on one and maple butter on the other.

Baby Beaver Tails


Ingredients

1/4 cup warm water

2 Tbsp sugar

2 tsp yeast

1/2 cup warm milk

1 egg

2 Tbsp melted butter

2 3/4 cups flour plus flour for rolling

1/2 tsp salt

oil or lard for frying

Method

Dissolve the sugar in the water and add yeast. Let stand a few minutes until it becomes foamy. Mix the yeast with warm milk, egg and melted butter. In a large bowl combine flour and salt. Add the wet ingredients and combine well. Turn out onto a well floured surface and knead for about 5 minutes. Place in a clean bowl, brush with a little oil or melted butter, cover with a cloth and allow to rise to double the size, about two hours.

Punch down and form into balls about the size of a small egg. Roll each one into an oblong shape about 1/4 inch thick. Fry in hot oil or lard about two minutes on each side or until they are nicely coloured. You can deep fry them, but I used about 1/12 inches of oil in a small pan to reduce the amount of oil, and that worked fine.

Drain and sprinkle or spread liberally with whichever topping you choose. Serve warm.

DSC01811DSC01812

Be sure to roll them fairly thin as they do puff up a lot when fried. The result is a fluffy light pastry with a crisp exterior, something like a cross between a do-nut and a pancake. They can be frozen and reheated, or you could freeze the dough after its first rising in its punched down state and fry them the next day – especially if you plan to have them for breakfast.

DSC01809DSC01810

Have you had a beaver tail? If so, what flavour do you prefer with it?


21 Comments

Pine Pasta

DSC01799

This is not the height of foraging season. We have loads of snow and the ground is frozen and completely inaccessible. Yet there is a surprising amount of wild edibles that can still be found and used at this time of year – mostly from trees. The other day I had the pleasure of being invited to hike through a private woods with well-marked snowmobile tracks. Among all the evergreens, apple, oak and birches there were a good number of white pine trees.

DSC01792

I chose this particular tree because first of all it offers needles which are not only edible but have a very pleasant flavour in small quantities. The other reason I prefer to use them in this space is they are so easy to identify. Their long soft needles are arranged in bunches of five – the only tree with this particular characteristic.

DSC01794

DSC01795

I pick only the needles at the end of branches where they are less likely to be covered with any of the sap. Of course I choose trees which are easy to reach, but mature enough that the needles are good and long as in the picture above. Make sure that the area where you pick has not been treated with chemicals.

Once picked, remove the brown tip at the base. To dry the needles thoroughly, place them in a dehydrator or oven at about 50 degrees C or 130 degrees F for about ten hours, until they snap when bent. Then they need to be ground to a fine powder in a coffee or spice grinder.

DSC01779

Like this, they can be stored in a cool dark place for several months and used in baking, marinades, sauces etc.

I decided to blend them in a pasta recipe. I used spelt flour, but you can substitute plain white flour in the same quantities.

Pine Pasta


Ingredients

2 cups flour

3 eggs

2 Tbsp oil

1/2 tsp salt

1 Tbsp pine powder

Method

Mix the flour, salt and pine powder. Make a well and add the eggs and oil, mixing this together with the flour and blending in the flour bit by bit. Or do as I did and just mix it all in the food processor. Once the dough has all come together, remove it and knead on a floured surface for about five minutes until it is smooth and elastic-feeling. Wrap it in a damp towel or plastic and refrigerate for about 20 minutes.

Divide into four pieces or more, roll out very thin and cut in strips.

Put the noodles into boiling salted water for about four minutes or until the pasta feels al dente.

DSC01781

DSC01783

I found the taste of these noodles very pleasant and not at all overpowered by the pine, which did impart an interesting and delicate flavour. Any of your favourite pasta sauce recipes would work well with this, but I went for a non-saucy mixture of vegetables and chicken. I first fried some onion and portobello mushroom, a few pieces of roasted chicken and then added greens (dandelion and Chinese broccoli) just long enough to wilt them. Tossing the whole mixture into the pasta, I then seasoned it generously with my sumac pepper.

DSC01787

Served with a glass of sumac mead and followed with a dessert of maple walnut baklava, it was the most foraged dinner I have ever served – and all this in the dead of winter.

Pine Pasta on Punk Domestics


51 Comments

Maple Walnut Baklava

Maple season will soon be upon us so now is the time to put new recipes out there for all the maple syrup enthusiasts. After all, there is much more that can be done with this delicious sweetener than pour it on waffles and pancakes.

I am not the first to come up with the idea of making baklava with maple syrup as a sweetener, but all the recipes I found on line also added refined white sugar. It is beyond me why one would want to mix maple and sugar since avoiding the latter is one good reason to use the former. To cut the sweetness of the syrup, I used some plain almond milk, but any milk would work fine. This and a conservative amount of syrup resulted in delicious but not overly sweet dessert. If you want it sweeter, you can add more syrup. Walnuts seemed like the logical choice for the filling since they pair so well with maple, but hazelnuts, pistachios or a mixture of any of these would also work well.

DSC01767

Maple Walnut Baklava


Ingredients

filo pastry

1/4 cup butter

2 1/2 cup almonds

1 tsp ground cinnamon

1 tsp ground sumac (optional)

1/2 cup maple syrup

1/4 cup almond milk

Method

Chop the nuts and mix well with the spices.

Melt the butter in a saucepan.

Butter the base of a 9″ square pan. Place two sheets of filo pastry in the pan and brush with some melted butter. Repeat this three more times for a total of eight sheets of filo. Sprinkle two cups of the nuts over the pastry, then cover with two more sheets of filo. Brush with butter and repeat with two more sheets. Brush the top with more butter and sprinkle the remaining nuts on top. Cut with a sharp knife into squares or diamond shapes.

Bake in a 350 degree oven for about 20 minutes, until the top is crisp and golden.

Mix and heat the syrup and milk and pour over the pan. Allow to cool.

DSC01776

I’m off to Fiesta Friday to share these treats with everyone. A big thank you to our host Angie and co-hosts Suzanne and Sue for keeping the party going.


9 Comments

Sumac Mead

DSC01666

Having successfully made and consumed mead this winter with a simple solution of roughly one part raw honey to five parts non-chlorinated water and allowing it to ferment for two to three weeks, I decided to try it with the sumac juice (pictured above). This juice was made by soaking staghorn sumac berries in water for a couple of hours and straining.

100_1018

I used the juice in the same proportion to the honey and left it covered for three weeks stirring every few days, although it was quite good after two. The longer it is left, the better it is. Once it goes a little fizzy and tastes good, you know it’s ready to drink or store. With the sumac mead, I strained it before serving to remove any of the sediment.

If you haven’t tried fermenting before, mead is a great place to start. Nothing could be easier, and it makes a delicious wine substitute. I tried to measure the alcohol content, but haven’t figured out yet how to use my special thermometer for the purpose. Fellow drinkers have guessed it to be about 7%, but I can’t guarantee that.

I also have no way of knowing what the PA reading is. I just know it tastes fine – actually much better than fine. It is a tad sweeter than any wine I normally drink, but still light and dry enough to be enjoyed with dinner. The flavour of the sumac adds just a touch of tang to the sweetness of the honey.

I must have mentioned the health benefits of sumac in one or more of my previous posts on the subject, but it is worth noting that sumac has many vitamins and minerals including a good amount of Vitamin C. It also has  anti-fungal, anti oxidant and anit-inflammaroty properties. Given that it is in its raw state and fermented to boot, I think this might actually be classified as a health drink.

DSC01762

Perhaps after this experiment, I will have to try my hand at sumac wine, but this drink is so good I’m not sure it’s worth the trouble.


23 Comments

Sumac Pepper and the Best Popcorn Ever

Dried sumac

I have posted many recipes calling for sumac. I just love its distinctive lemony flavour and the ease with which it can be processed and stored. Lemons figure on my shopping lists a lot less frequently since I have been using sumac regularly, but am still trying to find more ways to use it.

I have made popcorn with sumac before, but this recipe  from Zester Daily caught my attention because it is for a spice mixture I had not tried, a mixture which is useful for a lot more than just popcorn. I have also written about making za’atar, but there is always room for more variety in my spice cabinet.

DSC01747

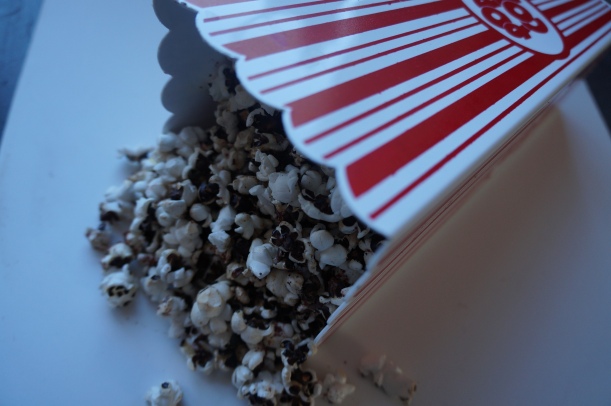
This recipe also gives me a chance to show off my own home-grown popcorn. It is called Black Dakota, and while any popping corn is good, this one is so pretty before and after popping that I jump at the chance to talk about it and maybe encourage others to grow this organic, non-GMO, easy-to-grow corn. The kernels are a deep purple, and when popped it is very white with a striking black centre.

DSC01753

I have copied the recipe as written on Zester Daily.

Sumac Pepper


2 Tbsp ground sumac

2 Tbsp ground black pepper

1 Tbsp salt (optional)

1/2 tsp sugar

1/2 tsp granulated garlic

1/2 tsp granulated onion

Mix all the ingredients together and store in a cool place.

DSC01748

It doesn’t matter what kind of popping corn you use. It is by far the best flavoured popped corn I have ever had. Just drizzle a little melted butter or olive oil over the corn and sprinkle on the sumac pepper. Likewise it is excellent in a marinade, added to vegetable or meat dishes, on sandwiches, pastas, salads etc. Have fun with it!