Along the Grapevine


9 Comments

Beet and Currant Salad

DSC03583.JPGWhen I read today’s Fiesta Friday post, one recipe featured from last week particularly caught my eye and I decided to make it right away. Unwilling to go shopping I had to make do with either what I had in my own kitchen or garden, and by the time I finished I had used in my version, still recognizable as Monika’s,  a few ‘new’ ingredients I thought worth sharing.

The recipe I refer to is one for Pomegranate Beet Salsa by Monika at Everyday Healthy Recipes.  It is the perfect dish for these hot dry days- simple to prepare, keeps well, and as good on its own as it is a side dish. Thank you Monika!

The so-called new ingredients in my recipe are red currants (ribes rubrum) and Queen Anne’s lace (daucus carota) leaves. The currants I have used before to make salad dressing and mayonnaise, but I had never thought of putting them whole into a salad. They are found in much of North Eastern US and Eastern Canada. Once established they thrive in sunny spots, and apparently are drought resistant given that they are still thriving in our back yard desert. One source I read describes them as a brilliant red skin encasing a pulpy flesh that contains 3-12 tiny edible seeds with flavours of raspberry, cranberry, gooseberry, rhubarb and a hint of rose. That sounds about right to me. Many sources say they are delicious as long as you add lots of sugar, which explains why they are most often used to make jelly. However, used sparingly in a savoury dish such as this one, no sugar is needed.DSC03586.JPG

As for the Queen Anne’s lace, there is so much of it blooming right now, but I had not given any thought to anything other than the flowers. I know that all parts of the plant are edible and often see reference to the leaves as being good in salads, but have never seen a salad recipe that calls for them. For identification and further information on this plant, please check here.dsc03429.jpg

Again, the herbs I used are all from my garden, but this salad is versatile, and you can make your own mix of greens to add. As for the oil, I used my black walnut infused oil, and I think any nut oil would be good, or just a good quality oil as Monika suggests, such as grape seed oil.

Beet and Red Currant Salad

3 Tbsp finely chopped red onion
3 Tbsp balsamic vinegar
2 cups chopped beets, previously boiled, cooled and peeled
2 Tbsp chopped Queen Anne’s lace leaves
1 heaping Tbsp each of fresh mint and dill
2 Tbsp oil
salt and pepper to taste
3/4 cup red currants
Put the onion and vinegar in a bowl and allow to sit while preparing the other ingredients. Add everything except the currants and mix well. Gently fold in the currants. Refrigerate for at least an hour before serving for best flavour.

DSC03580.JPGLinked to: Fiesta Friday #233


25 Comments

Rhubarb Chutney

I have been making rhubarb chutney as long as I have been cooking. It is more than an condiment for Indian dishes – it can be added to sauces, meatloaves, dressings, dips and sandwiches. It is simple and quick to make, and takes care of all that surplus, if that is a problem, in a way that will preserve it for the months to come. I have not made it the same twice – the choice of spices is endless and it is worth trying different combinations. Starting with rhubarb, sugar and vinegar, just add whichever spices you fancy. Make it as spicy or sweet as you wish, and just follow your nose (the olfactory part that is).

The problem with my rhubarb is that it is not of the ‘pretty’ variety. The middle is green, and although it tastes as good as any, it makes the chutney brown. In this recipe, I attempted to make an appealing red colour, so I offer a few tips to achieve this, as well as a method to prevent overcooking the rhubarb which I think also detracts from its appearance.

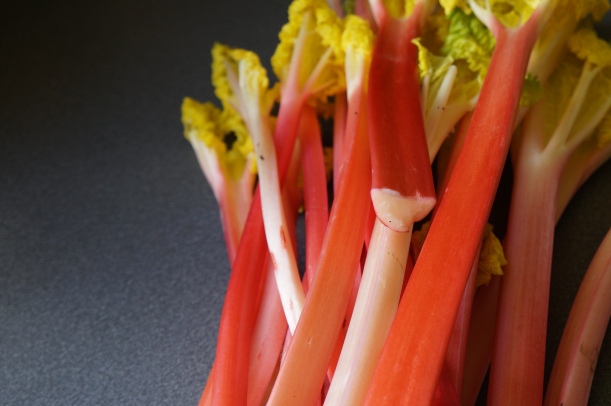
In order to do this, I used forced rhubarb, a method I described in an earlier post. This is not necessary, but it did make a difference in the colour. Below is a picture of my freshly picked forced rhubarb. It really is a bit sweeter and more delicate than the grown-in-the light variety.

DSC03380.JPG

I also made a rhubarb custard pie with some of it, just to highlight the beautiful colour.

DSC03390

To reduce the cooking time of the rhubarb and prevent it from collapsing into a stringy sauce, I cooked all the other ingredients first and added the rhubarb just for the last few minutes.

I processed half the jars in boiling water for ten minutes, and this also had an effect on the colour, so if you want a really pink product, it’s best to seal in jars and store them in the freezer. I also used a red vinegar, namely one in which I infused red choke cherries, but I’m not sure this made a significant difference.

Rhubarb Chutney

Ingredients

6 cups rhubarb, chopped into 1/2 inch pieces

2 cups sugar

1 1/2 cups cider or red vinegar

1 onion

3 red chili peppers

1 tbsp fresh grated ginger

1 stick cinnamon

3 tsp minced garlic

1 tsp fennel

1 tsp salt

1 cup raisins (or other dried fruit)

Method

Mix the sugar and rhubarb and allow to stand overnight or about 12 hours. Strain the syrup from the rhubarb and mix it with all the other ingredients. Cover the mixture with a tight fitting lid, bring it to a boil and simmer for about 1 hour. Remove the cinnamon stick and add the rhubarb. Continue to cook for a further 20 minutes or until the rhubarb is just soft but not disintegrating.

Makes 1.5 litres.

DSC03387.JPGLinked to Fiesta Friday #172

Dandelion Flower Syrup on Punk Domestics

Other rhubarb recipes: Rhubarb Ice Cream;  Crabapple, Rhubarb and Ginger Jam;  Sumac and Rhubarb Soup;  Rhubarb and Berry Crisp;  Spruce Tip Panna Cotta with Rhubarb Sauce;   Wild Berry Tarts with Rhubarb Curd;  Rhubarb Crabapple Ketchup


36 Comments

Green Tomato Ketchup

DSC02628

I don’t suppose I am the only one who had a lot of unripened tomatoes before the frost hit last week. I picked all I could, and tried to think of the quickest and easiest way of using them, but at the same time making something worth the effort.

Just as I was pondering all this, I came across this recipe by Chef Stef at The Kiwi Fruit for a green tomato drink  which I made one batch of. It was, as she promised, delicious – hot or cold, or even spiked. Something like a salad in a glass.

DSC02631

Wondering what to do with the rest, it occurred to me I had never made ketchup from green tomatoes before, and as ketchup is such a useful staple, it seemed like the best idea for using up the rest of my unripe harvest. In order to make a recipe I could safely can, I looked on line for a tested recipe which you can find here. I made a few changes, adding a bit of ginger, pureeing the mixture and skipping the salting step. I made only half the recipe and ended up with roughly 6 cups.

Green Tomato Ketchup

Ingredients

3 lbs green tomatoes

1 1/2 lbs onion

1 Tbsp salt

1 inch of fresh ginger

1 12 cups cider vinegar

1 3/4 cup sugar

3 Tbsp pickling spices

Method

Chop the tomatoes, onion and ginger and place in a pot. Add salt and vinegar and cook until softened. Puree them in a blender and return to the pot. Add sugar and the spices tied up in a piece of cheesecloth. Bring to a boil and simmer until the mixture thickens, between 40 minutes and a hour.

DSC02633

If you’ve never made your own ketchup before, you will be surprised at how fresh and flavourful it is compared to the store-bought varieties.

DSC02646

Green Tomato Ketcup on Punk Domestics

Besides, there are so many kinds of fruit and spices you can use. Other ketchup recipes I have made are:

Rhubarb Crabapple Ketchup

Tomato Ketchup with Sumac

Highbush Cranberry Ketchup

Wild Grape Ketchup

Linked to Fiesta Friday #91


36 Comments

Lambsquarter Samosas

DSC02404

I have written about lambsquarters ( chenopodium album ) in previous posts, and as I practice what I preach, I do use these super greens throughout the season – and even freeze and dry them for use in the winter. They can be used in any recipe calling for spinach, so there is really no need to compile too many recipes for it on the blog. But at this time of year, it is worth remembering that this plant is widely available, easy to harvest, and well worth the bother. For cooked dishes, I actually prefer it to spinach as it has a nicer texture and more flavour. I use it in savoury pies, quiches, stir fries, soups – in short, I use it a lot.

If allowed to grow, they can grow very tall, and if the soil is good they will continue to produce a deep green leaf with no blemishes. I have some beautiful patches, all grown in rich organic soil. Just remember not to pick it in any contaminated soil as it can absorb nitrates. Also, if using raw, it is advisable to add lemon to neutralize the oxalic acid.

DSC02345

I decided to try making a variation of samosas. Normally I make these with carrots, potatoes, peas and spices, but using what I have available in the garden at the moment meant something greener.

So a green curry paste with lots of greens mixed in, and a simple samosa dough which is super elastic and easy to work with.

Just fry some chopped onions and potatoes.

DSC02383

Add the spices, herbs and greens.

DSC02385

Roll out the dough, cut and place a spoonful of mixture on top.

DSC02389

Roll up samosa style, and bake.

DSC02388

Lambsquarter Samosas


For the pastry

2 cups flour

1 tsp salt

2 Tbsp oil

3/4 – 1 cup of water

Mix the flour, salt and oil thoroughly. Gradually add the water until the dough holds together. Cover and chill for about an hour. Roll very thin, and cut into circles to make the samosas.

For the Filling

oil for frying

1 onion, chopped

1 new potato, chopped and unpeeled

2 cloves of garlic, minced

2 Tbsp green curry paste

2 Tbsp fresh mint, chopped

1 Tbsp fresh coriander, chopped

1 cup peas or green beans, chopped into small bits

1 cup steamed lambsquarters

salt and pepper to taste

Fry the onion and potato until the potato is cooked. Add the garlic, cury paste and herbs and fry 2 minutes longer. Add the peas, cooked lambsquarters, salt and pepper and cook another minute, stirring to combine everything well. Allow to cool.

To fill, place a spoonful of filling on a circle of dough about 3 inches in diameter.

Press together the opposite sides from the middle to the end, forming a cone shape. Then pull up the base of the open part to join the first seam, creating another seam perpendicular to the first one.

Place samosas on a parchment lined baking tray and bake at 350 degrees F for about 30 minutes.

Mine are a little dark because I used Red Fife flour, but if you want them a lighter, more golden colour, use all purpose flour.

Samosas are excellent with a tamarind chutney, but as I am using local ingredients, I made a dipping sauce with crabapple paste mixed with enough vinegar to make a thick sauce, a little cumin and some methi (dried fenugreek leaves) sprinkled on top.

DSC02400

I served it with a cabbage salad, cucumbers garnished with lemon balm and raita made with fresh mint and purslane.

DSC02399

DSC02402

They can be served hot or not, as an appetizer, part of a meal, or just a healthful snack when you have been out exerting yourself, which in my case means ripping out masses of weeds, including lambsquarters. By the way, the weeds are doing very well this summer.

Linked to Fiesta Friday #78.

Related posts: Barley with Lemon and Lambsquarters;  Lambsquarters Triangles;   Lambsquarters and Farro Burgers


23 Comments

A Recipe dedicated to Selma

This week at Fiesta Friday we are remembering Selma, one of our dear fellow-bloggers who recently passed away. Although I did not know her personally, she became a source of inspiration for me not only with her wonderful recipes, but cooking tips and techniques. She was supportive and friendly in her comments, generously giving of her time to help any of us who asked. You can visit her blog at Selma’s Table and read for yourself her stories and recipes from a wonderful life

She and I shared some favourite cookbook writers, one of which was Yotam Ottolenghi whose recipes so often make use of my favourite garden produce with some tantalizing innovative touches. I decided to dedicate to Selma one such dish from his book Plenty, all the ingredients for which I already had either in my garden or pantry. Well, almost. Instead of verjus I used my own version made from unripe blueberries, and I used sunflower seeds instead of pine nuts. Rather than roasting the small beets in the oven with aluminum foil for 45 minutes, I wrapped them in corn husks and roasted them in an iron pan for 15 minutes. I saved on electricity and aluminum! And the beets take on a deliciously smoky corn flavour. Here is how I did it.

DSC02326

Place baby beets on corn husks

DSC02327

Wrap securely and twist the ends

DSC02328

Cook on medium high heat for 15 min. turning often

The recipe is copied, almost verbatim, with my variations in brackets.

Asparagus, Fennel and Beets with Verjus

Ingredients

1/4 lb mini beets

1 1/3 cup verjus

4 Tbsp grapeseed oil

salt and black pepper

4 to 5 oz fresh pencil-thin asparagus, or normal asparagus

1/2 large fennel bulb (1/4 lb) halved vertically (or 1 very small whole one)

1/4 cup pine nuts (or sunflower seeds)

1 tbsp dill leaves to garnish

Method

Clean and trim the beets. Either bake in an oven-proof dish at 400 degrees F for 45 minutes covered with aluminum foil, or use my method as described above.

Pour the verjus into a small saucepan, bring to a light simmer and leave it to reduce to about 3 tbsps. When cooled, whisk in the grapeseed oil and salt and pepper to taste. Put aside.

If using normal asparagus, cut the spears on a sharp angle into long and very thins slices, or use a potato peeler to make ‘shavings’.

Arrange the vegetables on small serving plates. Scatter with roasted nuts (or seeds). Drizzle on the dressing and garnish with dill.

DSC02333

I think this salad would go very well with many of Selma’s dishes and I hope she would agree.


15 Comments

The Greatest Scapes

scapes

In this part of the world it is scape season, and they are commonly found in markets, CSA boxes and if you grow hard neck garlic, in your own garden. They are the long shoots that bear the flower, and this should be removed from the plant when it appears and before the flower starts to open in order for the garlic to grow big and healthy.

My scapes are not quite there yet, but I did get an entire bushel from a kind neighbour who had a bit of a windfall. Not one to look a gift horse in the mouth, I accepted them happily and then set to work.

DSC02190

Scapes are a wonderful addition to the pantry in the winter. Milder than garlic, they can be added to just about any savoury dish. My usual routine is to make scape pesto, but this would have been a monumental task and required more nuts than I have. Also, I wanted to do things a bit differently this year. Considering convenience, space and of course taste, I came up with three ways to preserve them.

Freezing: Very simple, but a bit bulky, so I packed just a few bags. To freeze them, first remove the long bit on top of the flour. Chop the scapes into roughly 3 inch pieces which will make packing the bags easier. I then steamed them for about three minutes, just enough to heat them right through and kill any bacteria. Run under cold water and when cool, pack them tightly in bags and squeeze out as much air as you can.

DSC02203

Drying: After removing the long bit again, chop into fine strips. I used the slicing bade of a food processor for this. Place in the dehydrator at 125 F or 52 C for about eight hours, or until they are thoroughly dried and crisp. Place in a jar and store in a cool dark cupboard.

DSC02191

Fermenting: Remove the long bit and the flower. Put the flowers aside to be used later. One recipe for these follows, but they can be used to flavour soups, salads, sauces or whatever. They should not be fermented with the stalks as they are softer and will not hold up to the amount of fermentation required for the tougher stalks. I sliced the stalks as for the drying method so that they would be easier to spoon out, but if you want them larger or even whole, that is an option. Pack in a clean mason jar, pour brine over them (2 Tbsp salt dissolved in 1 litre of non-chlorinated water). To prevent them from coming into contact with air, I placed a few grape leaves on top and weighted them down. I used marbles. Place a clean cloth on top to prevent any foreign matter (like flies) getting in. They will take about five days to be ready to eat, but check periodically that none of the scapes have risen to the surface. With the grape leaves and the marbles, this is not likely to happen. The first few days, you will notice some bubbles coming to the surface. This is normal. When it subsides, after about five days, taste and see if it is fermenty enough for you. If so, cover and place in the fridge or other cool place. If you want it a little stronger, leave a day or two more. Remember that fermentation will continue as it ages but at a slower pace, so you should open the jar about once a week to allow any gas to escape.

DSC02202

Scape flower butter: With the half cup of flowers I had left over from my fermented batch, I mixed them with an equal amount of butter, 2 Tbsp of olive oil and salt to taste. This all blended together made a delicious garlicky spread.

DSC02207

The Greatest Scapes on Punk Domestics

Now I have enough scapes in different guises so that I can make pesto or whatever I like over the coming months, not to mention the scapes in my own garden I will have to contend with at a later date. Scapes anyone?

This time last year I posted: Plantain and Scape Pesto


19 Comments

Stinging Nettle Ravioli with Sage and Black Garlic Butter

DSC02178

When I first figure out how to use a wild edible from the garden, I like to keep it simple to see how the particular ingredient tastes and feels. I have done enough with stinging nettles that this time I wanted to make something a little more complex – and find a way to use up my prolific patch before it all goes to seed. Stinging nettle tastes very much like spinach, and loses its sting once cooked. It can be used in any recipe calling for cooked spinach, and vice versa.

DSC00635

I’ve made plenty of pasta dishes before, but never ravioli, so that seemed a good place to start. I also wanted to make a sauce to serve with it, one which is not so substantial that it would take over the dish, but with enough flavour to jazz it up. Enter black garlic – an ingredient I have been wanting to make myself but not sure that with the risk it involves it would be worth using the amount of electricity required. I did pick up a package of black garlic when in Spain, so this seemed a good time to try it out. Mixed with sage, butter and a little lemon sounded like a plan. Some might like a little grated parmesan on the finished product, but hardly necessary.

If you are not familiar with black garlic, it is garlic which has been cured over several weeks at a warm temperature, and then aged further. The cloves turn a definite black, are soft and gooey in texture, and have a wonderful smokey, sweet flavour which works in just about any dish calling for garlic. These came in a box of two heads with the papery skin all in tact. It is expensive though, and if you don’t have it, roasted garlic would be a good substitute.

DSC02171

DSC02172

For the pasta

2 cups flour (I used whole wheat)

3 eggs

2 Tbsp cooked, pureed sweet potato (optional)

1 tsp salt

1 tsp olive oil

1 beaten egg

Make a well in the flour salt mixture and pour in the sweet potato, eggs and oil. Gradually mix the dry ingredients into the egg mixture until it is well combined. Wrap it up in a wet cloth or plastic and refrigerate for at least a half hour or up to 24. Bring it back to room temperature before rolling it.

Using about one-fifth of the dough at a time, form it into a rectangle about 1/2 inch thick then roll it out either with a rolling pin or a pasta machine. Either way, roll it several times. I started with the widest setting on the machine, folded the pasta over and passed it through again, repeating this several times. As I worked down to the thinnest setting, I folded the pasta in two each time, aiming for as rectangular a shape as I could get. This repeated rolling makes the pasta stronger and less likely to rip, even when very thin.

DSC02170

Remember to keep the dough you are not using covered so it does not dry out.

Place the rectangle on a board and cut in two. Brush the edges of one sheet with the beaten egg, including around where you expect to cut the ravioli. I brushed all four edges, one line down the centre lengthwise, and then across according to the size I wanted. Bigger is less work!

DSC02168

DSC02169

Fill the centres with a heaping tsp. of filling and place the other sheet on top. Press down around the edges of each piece and cut. Fork the edges to secure. Set on a floured surface and cover with a damp towel while you do the remainder.

For the Filling

1 1/2 cups cooked, chopped stinging nettles

1 Tbsp dried onion flakes

1/2 tsp salt

1/4 tsp nutmeg

1/2 cup crumbled feta cheese

Squeeze any excess water out of the nettles. Mix all the ingredients.

DSC02166

For the Sauce

1/2 cup butter

one handful of fresh sage leaves

3 cloves black garlic, chopped

1/2 tsp salt

a splash of freshly squeezed lemon juice or a lemon zest

Melt the butter in a saucepan. When it starts to foam, add the leaves and garlic. Continue to cook about 3 minutes. Add the salt and lemon.

DSC02173

Cook the ravioli in boiling salted water, about five minutes. Serve with a little of the butter sauce drizzled over it.

DSC02175

The sauce with the sage and black garlic is a winner. I will either have to cure my own, or maybe travel back to Spain for more, depending on which is more cost-effective.

I apologize for my late arrival at Fiesta Friday this week, but hope there are enough party-goers around to give this 3-part recipe a try.


4 Comments

Milkweed Shoots

DSC02159

I have already written about the other three edible parts of the common milkweed or asclepias syriaca (leaves, flowers and pods) in previous posts but this is the first spring where I have enough shoots to harvest them. In contrast with the other parts of the plant which can be picked off in small amounts without damaging it, collecting shoots means there will be no further growth. So unless you have plenty of them already well-established, you’d be well advised to allow them to grow. I have been encouraging their propagation for a few years now, and they are appearing virtually everywhere – among my perennials, in my vegetable gardens and in containers. There are still plenty in the ‘wild areas’ to provide ample sustenance for any monarch butterflies who make it here in the summer when they are in full bloom.

DSC00932

How to identify them: The shoots resemble young asparagus, but have leaves in opposing pairs pointing upwards against the stem. They have a milky sap and should not have a bitter taste. Any milkweed which tastes bitter, spit out and disregard. Make sure you do not confuse it with dogbane which has a smooth, as opposed to slightly fuzzy stem. Also, the colour of dogbane’s stem is reddish and thinner at the top where milkweed has a consistently green stem and is of equal thickness from top to bottom. Both have milky sap so do not rely on that fact for identification. Be sure you have properly identified it before eating.

Where they grow: This variety is native to  the eastern part of North America, and grow wild in open fields, roadsides and hedgerows. Some people cultivate them as ornamental flowers, and their seeds are easily spread. Toxic to many livestock, farmers try to keep their fields clear of it.

How to prepare them: The shoots need to be cooked, but not aggressively. If you are unsure or haven’t tried them before, you can boil them and discard the water. The flavour is similar to that of a cross between green beans and asparagus. If you have a small amount, they can be mixed with these vegetables and prepared in the same way.

DSC02160

The ones I picked were between one and six inches.

As this was the first time I had prepared them I kept it simple. I sauteed them in olive oil with dried garlic flakes and maldon salt for a few minutes until they were cooked through – a thoroughly tasty side dish.

DSC02162

Related posts:

Milking the Weeds

Milkweed Bud Fetuccine

Milkweed Flower and Lambsquarters Soup

Milkweed Flowers

Stuffed Milkweed Pods</a

Milkweed Shoots on Punk Domestics


22 Comments

Tandoori Pickerel and Curried Spring Vegetables

DSC01990

A dear blogger pal very kindly passed on to me some of her home-made Indian spices which I have been keen to feature with some of my own local ingredients. Although I haven’t posted many Indian recipes before on this blog,  South Asian cuisine is one of my favourites. I began to learn to cook during our two-year stint in Delhi, just before the craze for spicy Asian food hit North America in the 70s, and I have been at it ever since. It was in India where I really learned to appreciate local and fresh food, including home-ground spices which made everything from soup to nuts just so much tastier.

So when Sonal offered me some of her handiwork, I was thrilled. You can find her fabulous recipes on her blog, simplyvegetarian777 where you will discover some truly original recipes with a strong South Asian influence. Do drop by and check out her fabulous fare.

I met Sonal through The Novice Gardener’s weekly event, Fiesta Friday, so it is only fitting that I share these recipes with this week’s crowd. Our co-hosts this week are Effie @ Food and Daydreaming and Jhuls @ The Not So Creative Cook who will be working hard to keep the party lively.

The spices Sonal sent me were a tandoori masala, a curry and Kasuri Methi, or dried fenugreek. This latter I intended to use as a garnish and then unfortunately forgot, but I did taste it and it would have made a wonderful accent for the two dishes I did make.

DSC01978

For the tandoori spice mix I decided to make a fish dish using local wild pickerel, but you could use any firm fish.

Tandoori Pickerel

  • Servings: 4
  • Print

Ingredients

1 lb pickerel filet, skinned and cut into serving portions

1 Tbsp tandoori masala

1 Tbsp sumac

1 Tbsp flour, rice, chickpea or jerusalem artichoke

1 tsp grated ginger

1 tsp grated garlic

1 tsp chili powder

1 Tbsp vegetable oil

3 Tbsp plain yogurt

juice of 1/2 lemon

1/2 tsp salt

Method

Mix all the ingredients except the fish in a bowl to make a paste. Coat the fish pieces with the paste and place them on a grilling pan in a 350 degree oven for about 15 minutes. Turn the pieces over and continue to cook for another five minutes or so, depending on the thickness, until the fish is cooked through.

I managed to achieve a nice red-coloured paste thanks in part to the addition of sumac which also goes well with this mixture taste-wise.

DSC01980

DSC01984

To accompany this fish I wanted to make a really green curry with ingredients all from  my garden. The scapes, garlic, mustard seed and green chili are left over from last year’s crop, but the young dandelion leaves, lily shoots, and some nettles were all picked just moments before cooking.

Curried Spring Vegetables

  • Servings: 4
  • Print

Ingredients

oil for frying

1 tsp mustard seed

1 green chili, seeded and chopped finely

1 garlic clove, minced

2 tsp curry powder

3 packed cups of mixed greens, e.g. lily shoots, scapes, dandelion greens and nettles

salt to taste

juice of 1/2 lemon (optional)

Method

Heat the oil in a heavy skillet and add the mustard seeds. When they start to pop, lower the heat to medium and add the chili and mustard. Cook for 1 minute and then add the curry powder. Cook for another two minutes, stirring continuously. Add the washed, but not dried greens starting with the sturdier ones like scapes and shoots. When they start to turn a brighter green add the dandelion and nettles, cover and cook until they are just wilted. Remove from the heat and drizzle with lemon juice.

DSC01985

DSC01987

DSC01992


17 Comments

Sunchoke and Cauliflower Pizza Crust

If you happen to have any Jerusalem artichokes in your garden and you know where they are, now when the top layers of soil have finally thawed is the best time to harvest them. If you don’t have any of your own, you might find some at your local farmers’ market. This is a picture of my patch just before the snow melted – just a few dried up stems from last year.DSC01937

And here is what I dug up last week. DSC01960 DSC01963

Once I scrubbed them, sliced and dried them in a dehydrator at 135 degrees F for about 4 1/2 hours until they were crispy dry, I ground them, first in a food processor and then for a finer grind in my coffee grinder. This is what the resulting flour looks like. It would be lighter in colour if I had peeled them, but since they were freshly dug and the peels still very thin and light coloured I just prepared them skin on. DSC01819

This is an excellent way to store and use Jerusalem artichokes (or sunchokes). It keeps well and can be used in all sorts of savoury recipes and as a flavourful thickener for sauces and stews. In this form, they are less likely to cause any of the awkward digestion problems that cause some people to avoid them all together. I decided to make a gluten-free pizza crust with this batch combined with dehydrated cauliflower. By drying the cauliflower too, you get a stronger flavour from the vegetable and no juices to extract. Just rice the cauliflower and set your oven or dehydrator to a low temperature to dry it gently as with the Jerusalem artichokes. Once dried, grind it into a flour. For the pizza dough I used: 1/3 cup sunchoke flour 1/2 dried cauliflower 3 Tbsp coconut flour 2 Tbsp ground flaxseed 1 cup water Simply mix it in a food processor and form into a bowl. Roll out into the size and shape you want. Add whatever toppings you want and bake it in the oven as you would for any pizza until the edges start to turn a golden brown. DSC01825

I used pesto, grated cheese and some dandelion capers, but then I still had my cast on my arm and wasn’t going to make it complicated. I could not fool anyone into thinking this was a bread crust, but then why would I want to? The taste of artichoke and cauliflower combine to make a very light and easy to eat crust, and when you want to take a break from the wheat for a bit, this is a wonderful solution. I am sharing this novel pizza with all the party-goers at Fiesta Friday, graciously hosted by Angie from The Novice Gardener, co-hosted by Ginger at Ginger&Bread and Loretta at Safari of the Mind.